Configuration
User and API configuration guide for SureBright SFCC integration including user account creation, API client setup, and credential management.
Configuration#
This phase involves setting up proper user access and API credentials within your SFCC Account Manager to enable the SureBright integration.
Prerequisites: Ensure you have completed the Business Manager Setup before proceeding with configuration.
Integration Approaches#
Choose the configuration approach that best fits your team's technical capabilities:
Recommended for most merchants
SureBright handles all technical configurations while you focus on business requirements.
Best for: Merchants with limited technical resources
For technical teams
Your development team handles SFCC configuration while SureBright provides integration support.
Best for: Merchants with dedicated SFCC development teams
Full Business Manager Access#
This approach provides SureBright with comprehensive access to your SFCC environment, enabling our team to handle all technical configurations.
This approach requires granting SureBright administrative access to your SFCC Business Manager. All activities will be logged and auditable.
Create SureBright User Account#
Purpose: Create a dedicated SFCC user account for SureBright with appropriate permissions for integration management.
Step-by-Step Instructions:
Access Account Manager
Log into your SFCC Account Manager (separate from Business Manager)
Navigate to
Administration → Users and RolesClick "Add User" button to create a new user account
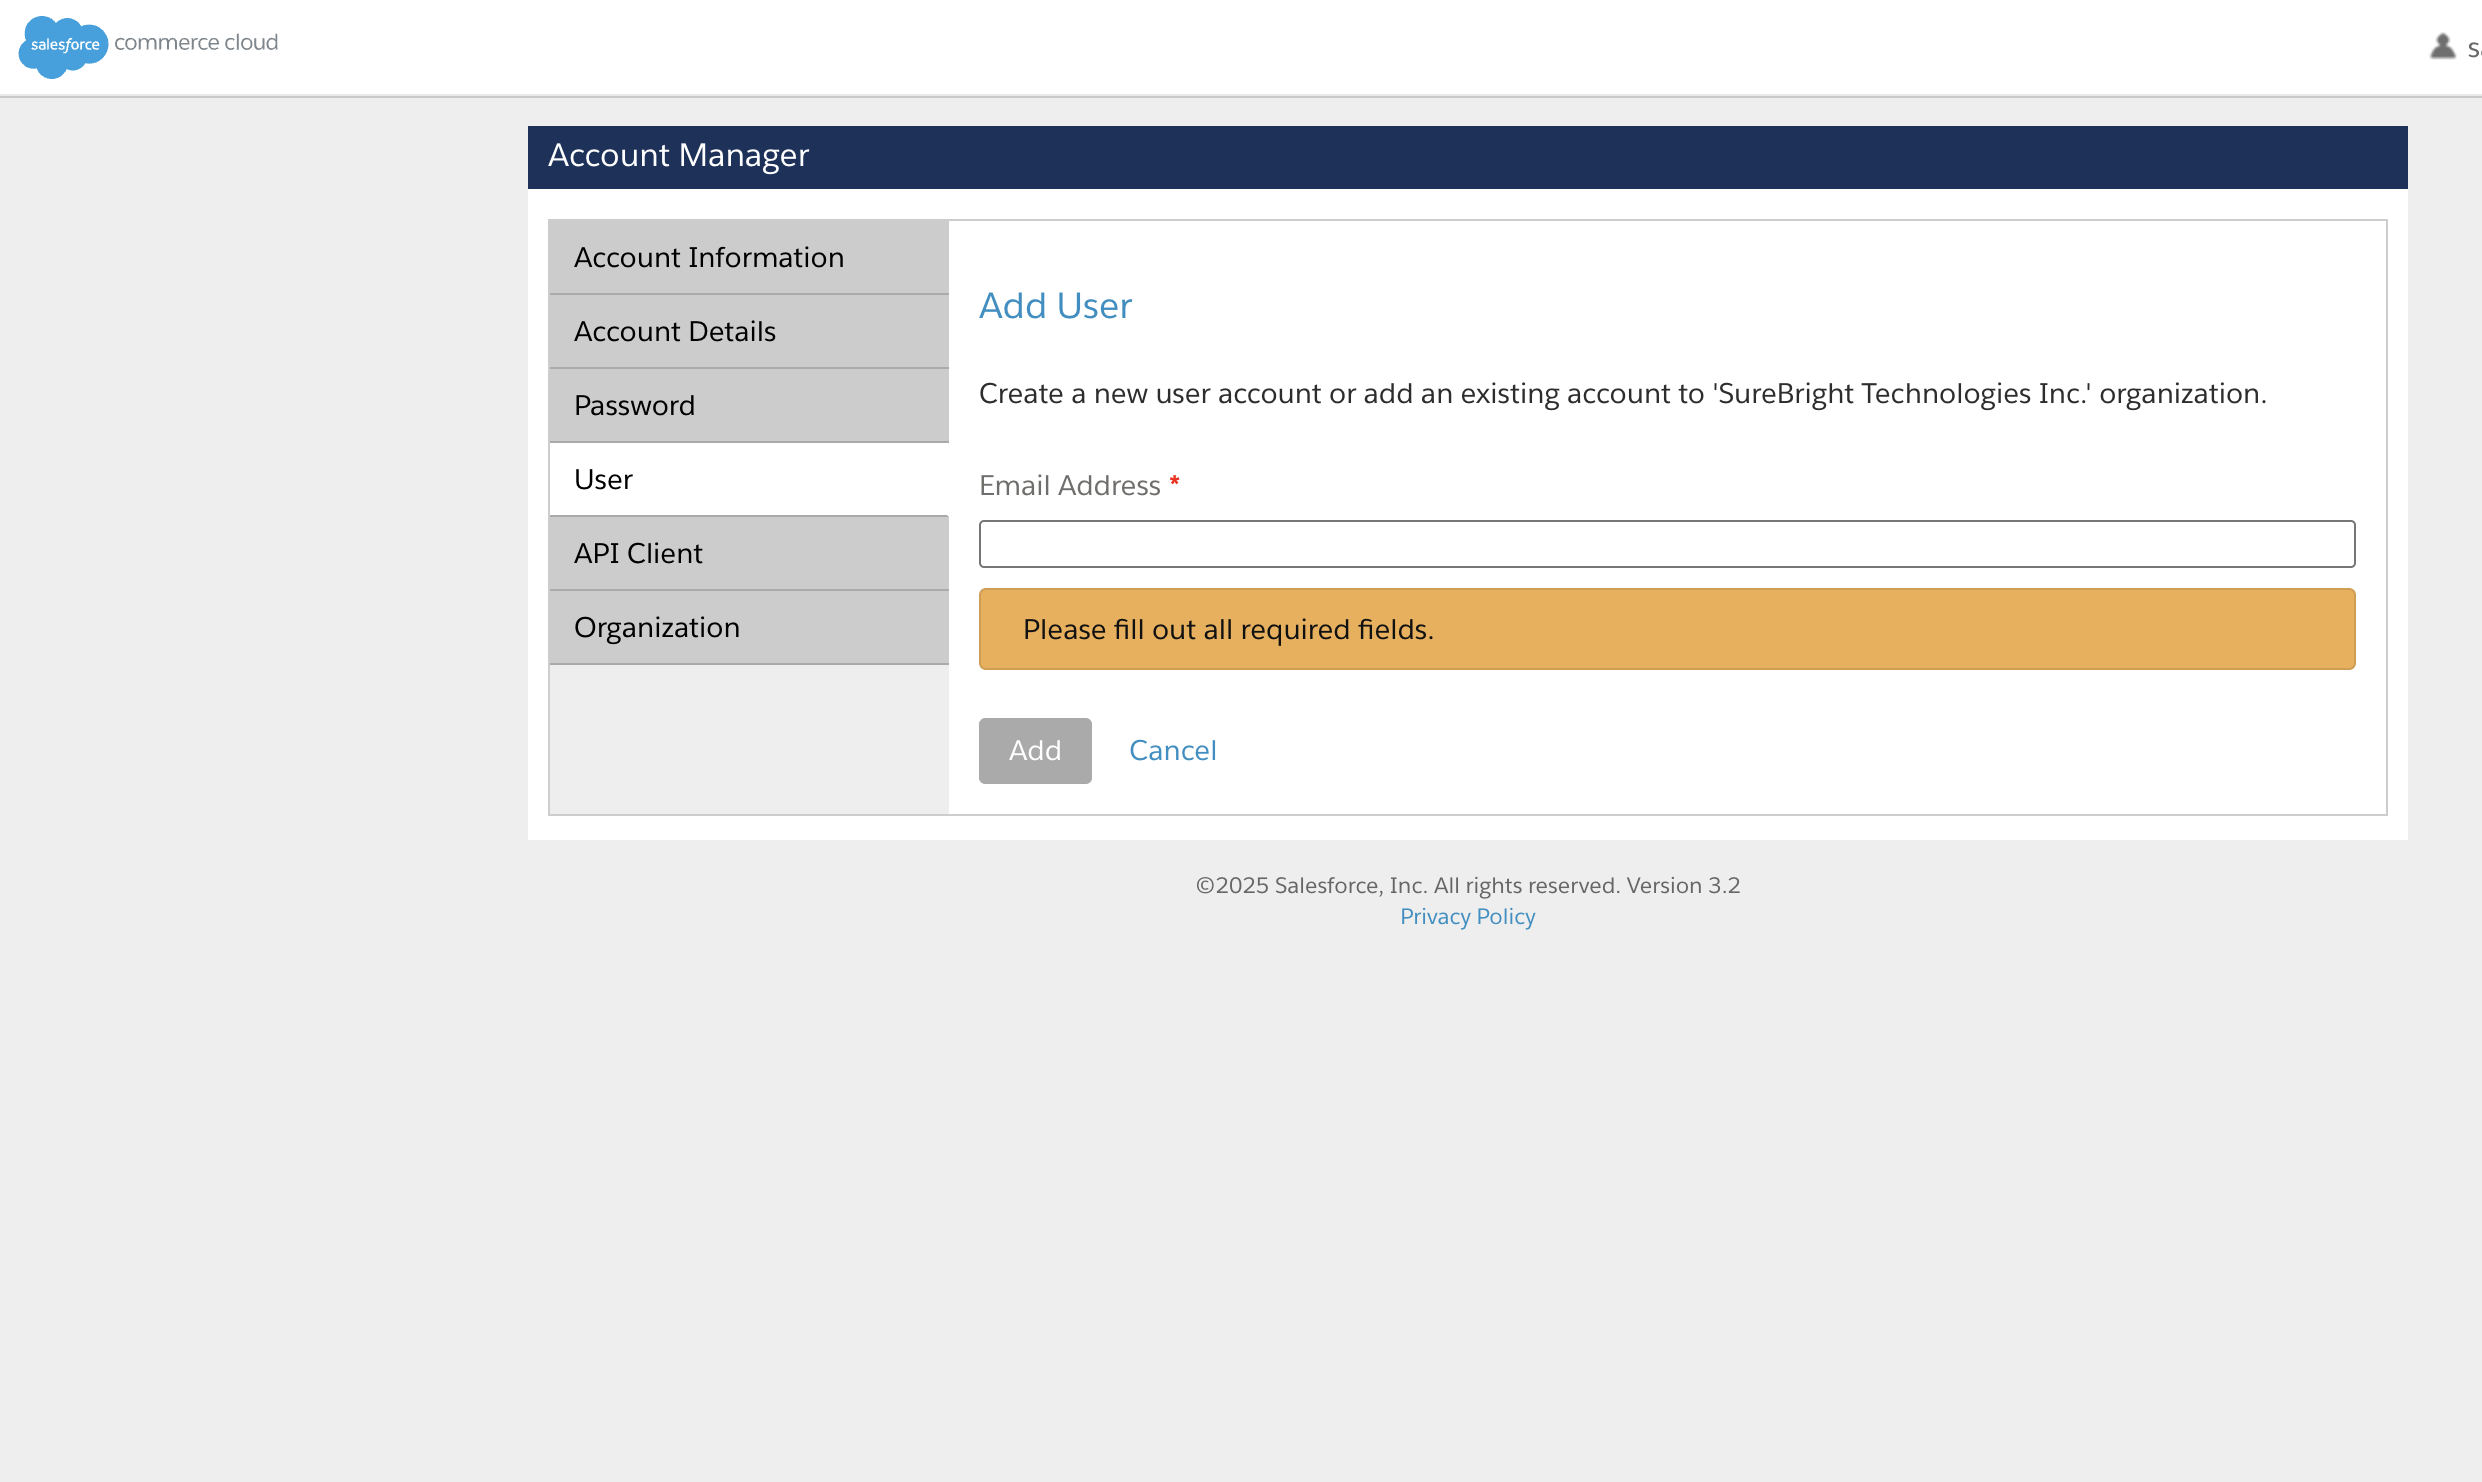
Configure User Details
Username:
surebright-integration(must be unique)Email: Use the email address provided by your SureBright representative
First Name:
SureBrightLast Name:
IntegrationPassword: Create a strong password (you'll share this securely with SureBright)
Status: Set to "Active" to enable immediate access
Assign Required Roles In the "Roles" section, select these specific roles:
Administrator: Provides full access to Business Manager configuration, cartridge management, and system settings
API User: Enables programmatic access to SFCC APIs for data synchronization
Job Manager: Allows import/export operations and job management for data sync processes
Verify and Save
Review all user details and role assignments
Click "Save" to create the user account
Note the username and password for secure sharing with SureBright
Security Note: This user account will have administrative access to your SFCC instance. Only share credentials through secure, encrypted channels and verify the recipient's identity before sharing.
Configure API Client#
Purpose: Create an API client that enables programmatic access to your SFCC instance for data synchronization and integration management.
Step-by-Step Instructions:
Access API Settings in Account Manager
In your Account Manager, navigate to
Administration → API SettingsClick "Create API Client" button
You'll need Account Manager administrative access to perform this step
Configure Client Settings Fill in the following information:
Client Name:
SureBright IntegrationClient Type: Select "Public" (this allows the client to be used by external applications)
Description:
API access for SureBright Product Protection integrationRedirect URI: Leave blank (not required for this integration type)
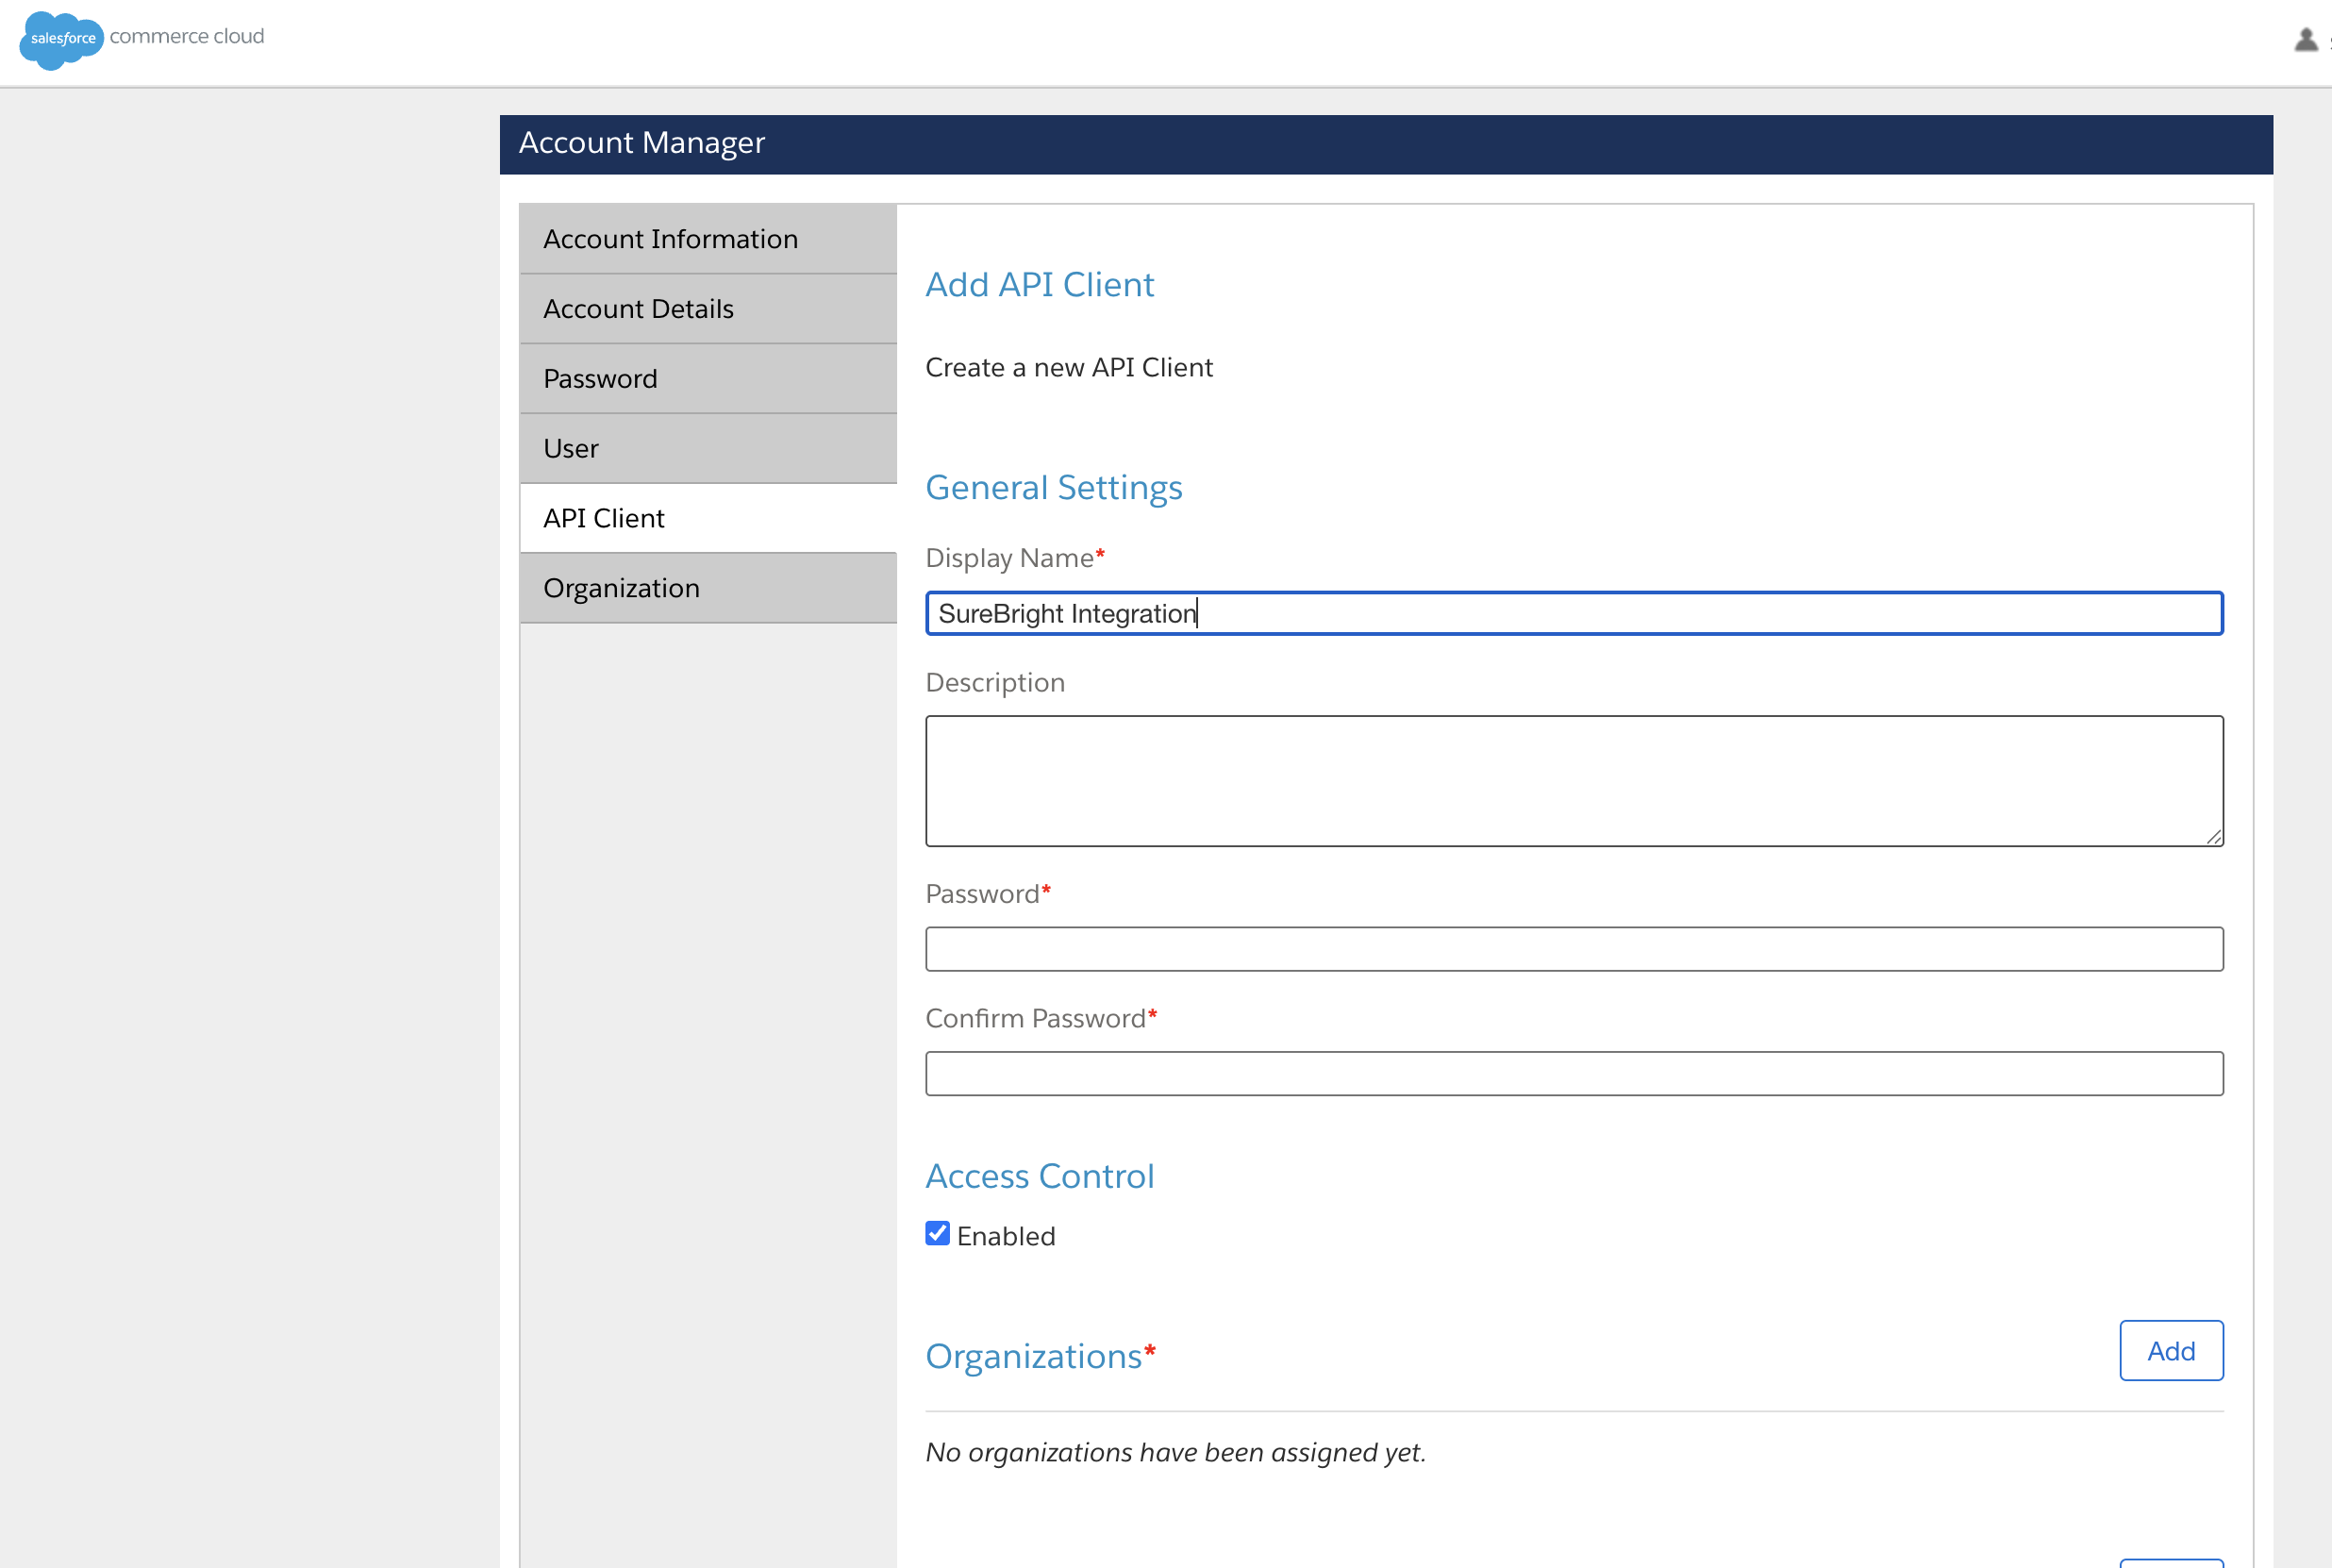
Assign Required OAuth Scopes In the "Scopes" section, check the following boxes to grant necessary permissions:
sfcc.catalogs.rw- Read/Write access to product catalogs (allows product data sync)sfcc.products.rw- Read/Write access to product data (enables product management)sfcc.orders.rw- Read/Write access to order information (for warranty order processing)sfcc.custom-objects.rw- Read/Write access to custom objects (for warranty data structures)sfcc.jobs.rw- Read/Write access to job management (for data synchronization jobs)
Save and Retrieve Credentials
Click "Save" to create the API client
Important: Copy and securely store these values immediately:
Client ID: Unique identifier for API authentication (you'll need this)
Client Secret: Secret key for API authentication (you'll need this)
Organization ID: Found in
Administration → Organization → Organization SettingsRealm: Part of your SFCC URL (e.g., if URL is
https://your-realm.demandware.net, realm isyour-realm)Short Code: Your site identifier (found in
Administration → Sites → [Your Site] → Settings)
Finding Your Organization Details: If you're unsure about Organization ID, Realm, or Short Code, refer to the FAQ section in the FAQs Page for detailed instructions.
Share Credentials Securely#
Purpose: Provide SureBright with the necessary credentials to establish secure API connectivity with your SFCC instance.
Required Information:
Client ID: [Your Client ID]
Client Secret: [Your Client Secret]
Organization ID: [Your Organization ID]
Realm: [Your Realm]
Short Code: [Your Short Code]
Security Requirements:
Use encrypted communication channels (encrypted email or secure file sharing)
Never share credentials via unsecured email or chat platforms
Consider using a password manager or secure note-sharing service
Verify the recipient's identity before sharing sensitive information
These credentials provide access to your SFCC instance. Treat them as sensitive business information and ensure they are shared only with authorized SureBright personnel.
API-Only Access#
This approach is designed for merchants with dedicated SFCC development teams who prefer to maintain full control over their SFCC environment.
This approach requires your development team to have experience with SFCC cartridge deployment, job management, and custom object configuration.
Create SFCC API Client#
Purpose: Create an API client that enables SureBright to provide integration support and data synchronization guidance.
Development Team Tasks:
Access Account Manager
Navigate to
Account Manager → Administration → API SettingsClick "Create API Client"
Configure API Client
Client Name: SureBright Integration
Client Type: Public
Description: API access for SureBright Product Protection integration support
Assign Required OAuth Scopes
sfcc.catalogs.rw     - Read/Write access to product catalogs
sfcc.products.rw     - Read/Write access to product data
sfcc.orders.rw       - Read/Write access to order information
sfcc.custom-objects.rw - Read/Write access to custom objects
sfcc.jobs.rw         - Read/Write access to job management
Document Credentials
Securely store all generated credentials
Prepare for secure sharing with SureBright team
Share Integration Information#
Purpose: Provide SureBright with necessary credentials and site configuration details for integration support.
Required Information:
API Credentials:
- Client ID: [Your Client ID]
- Client Secret: [Your Client Secret]
- Organization ID: [Your Organization ID]
- Realm: [Your Realm]
- Short Code: [Your Short Code]

Site Configuration:
- Inventory List ID: [Your Inventory List ID]
- Pricebook ID: [Your Pricebook ID]
- Site ID: [Your Site ID]Prerequisites:
Ensure inventory list and pricebook are properly assigned to your site
Verify all site configurations are complete and active
Confirm API client has been tested and is functional
Share this information only through secure, encrypted channels. Verify the recipient's identity before sharing sensitive credentials.
Integration File Distribution#
For API-Only Access, SureBright will provide your development team with all necessary integration files and detailed technical documentation for SFCC deployment.
Integration Package Contents#
Package Contents:
SureBright Integration Cartridge
Complete SFCC cartridge with warranty functionality
Compatible with your SFCC version
Includes all necessary controllers, models, and templates
Data Import XML Files
Job Import XMLs: Product sync and order sync job configurations
Custom Fields XML: Line item and product attribute definitions
Pricing XML: Warranty plan pricing configurations
Inventory XML: Warranty product availability settings
Technical Documentation
Detailed deployment instructions
Configuration parameters and settings
API integration specifications
Next Steps#
Once you have completed the configuration:
Set Up Data Sync: Use the Jobs Guide to configure automated synchronization jobs
Test Integration: Run comprehensive tests using the Testing Guide
Go Live: Deploy to production and monitor.
Getting Help#
If you encounter issues during configuration:
Check the FAQs Page for detailed solutions
Contact your SureBright representative for immediate assistance
Email support@surebright.com for technical support
✅ Configuration Complete#
Great job! You have successfully completed the configuration phase. The SureBright integration is now ready for data synchronization setup.
What's Next: Proceed to the Business Manager Setup to set up Business Manager.