---
title: "Install SureBright on Wix"
description: "Install the SureBright app on your Wix store, sign in to the SureBright merchant portal, switch your products on and get protection plans showing on your product pages."
---
SureBright for Wix is a single app. Install it, switch your products on in the Merchant Portal and publish your site, and shoppers see protection plans on your product pages.
Installing it connects your Wix store to SureBright, copies your products so they can be quoted, and places the SureBright offer just above **Add to Cart**. Shoppers buy a plan together with the product, and every plan sold becomes a SureBright contract.
The SureBright app for Wix is not listed in the Wix App Market yet. To install it now, ask your SureBright contact or [support@surebright.com](mailto:support@surebright.com) for the install link. The steps after the install are the same.
## Before you start
| Requirement | Why |
|---|---|
| **Wix Stores** on your site | SureBright reads your products and orders from Wix Stores. A site without it stays in setup until Wix Stores is added. |
| **Store currency in USD or CAD** | Plans are priced in US or Canadian dollars. Stores whose currency is anything else do not show the offer. If your store also sells in other currencies, shoppers see plan prices converted into the currency they pay in. |
| **Customers in the US or Canada** | Plans cover products delivered to US and Canadian addresses. A plan on an order shipped anywhere else is held for review instead of becoming an active contract. |
## Install the app
Install the **SureBright** app on your Wix site with the link from your SureBright contact. It is a single click, and there is nothing to configure in Wix. SureBright then creates your store, copies your products and places the protection offer on your product page.
After the install, Wix opens your site in the Editor on the product page. The SureBright box sits just above **Add to Cart** and shows a preview of the offer with **sample plans and prices**. Real plans and prices only appear on your live site.
The box also tells you how to finish setup: **click the box, then click Manage**.
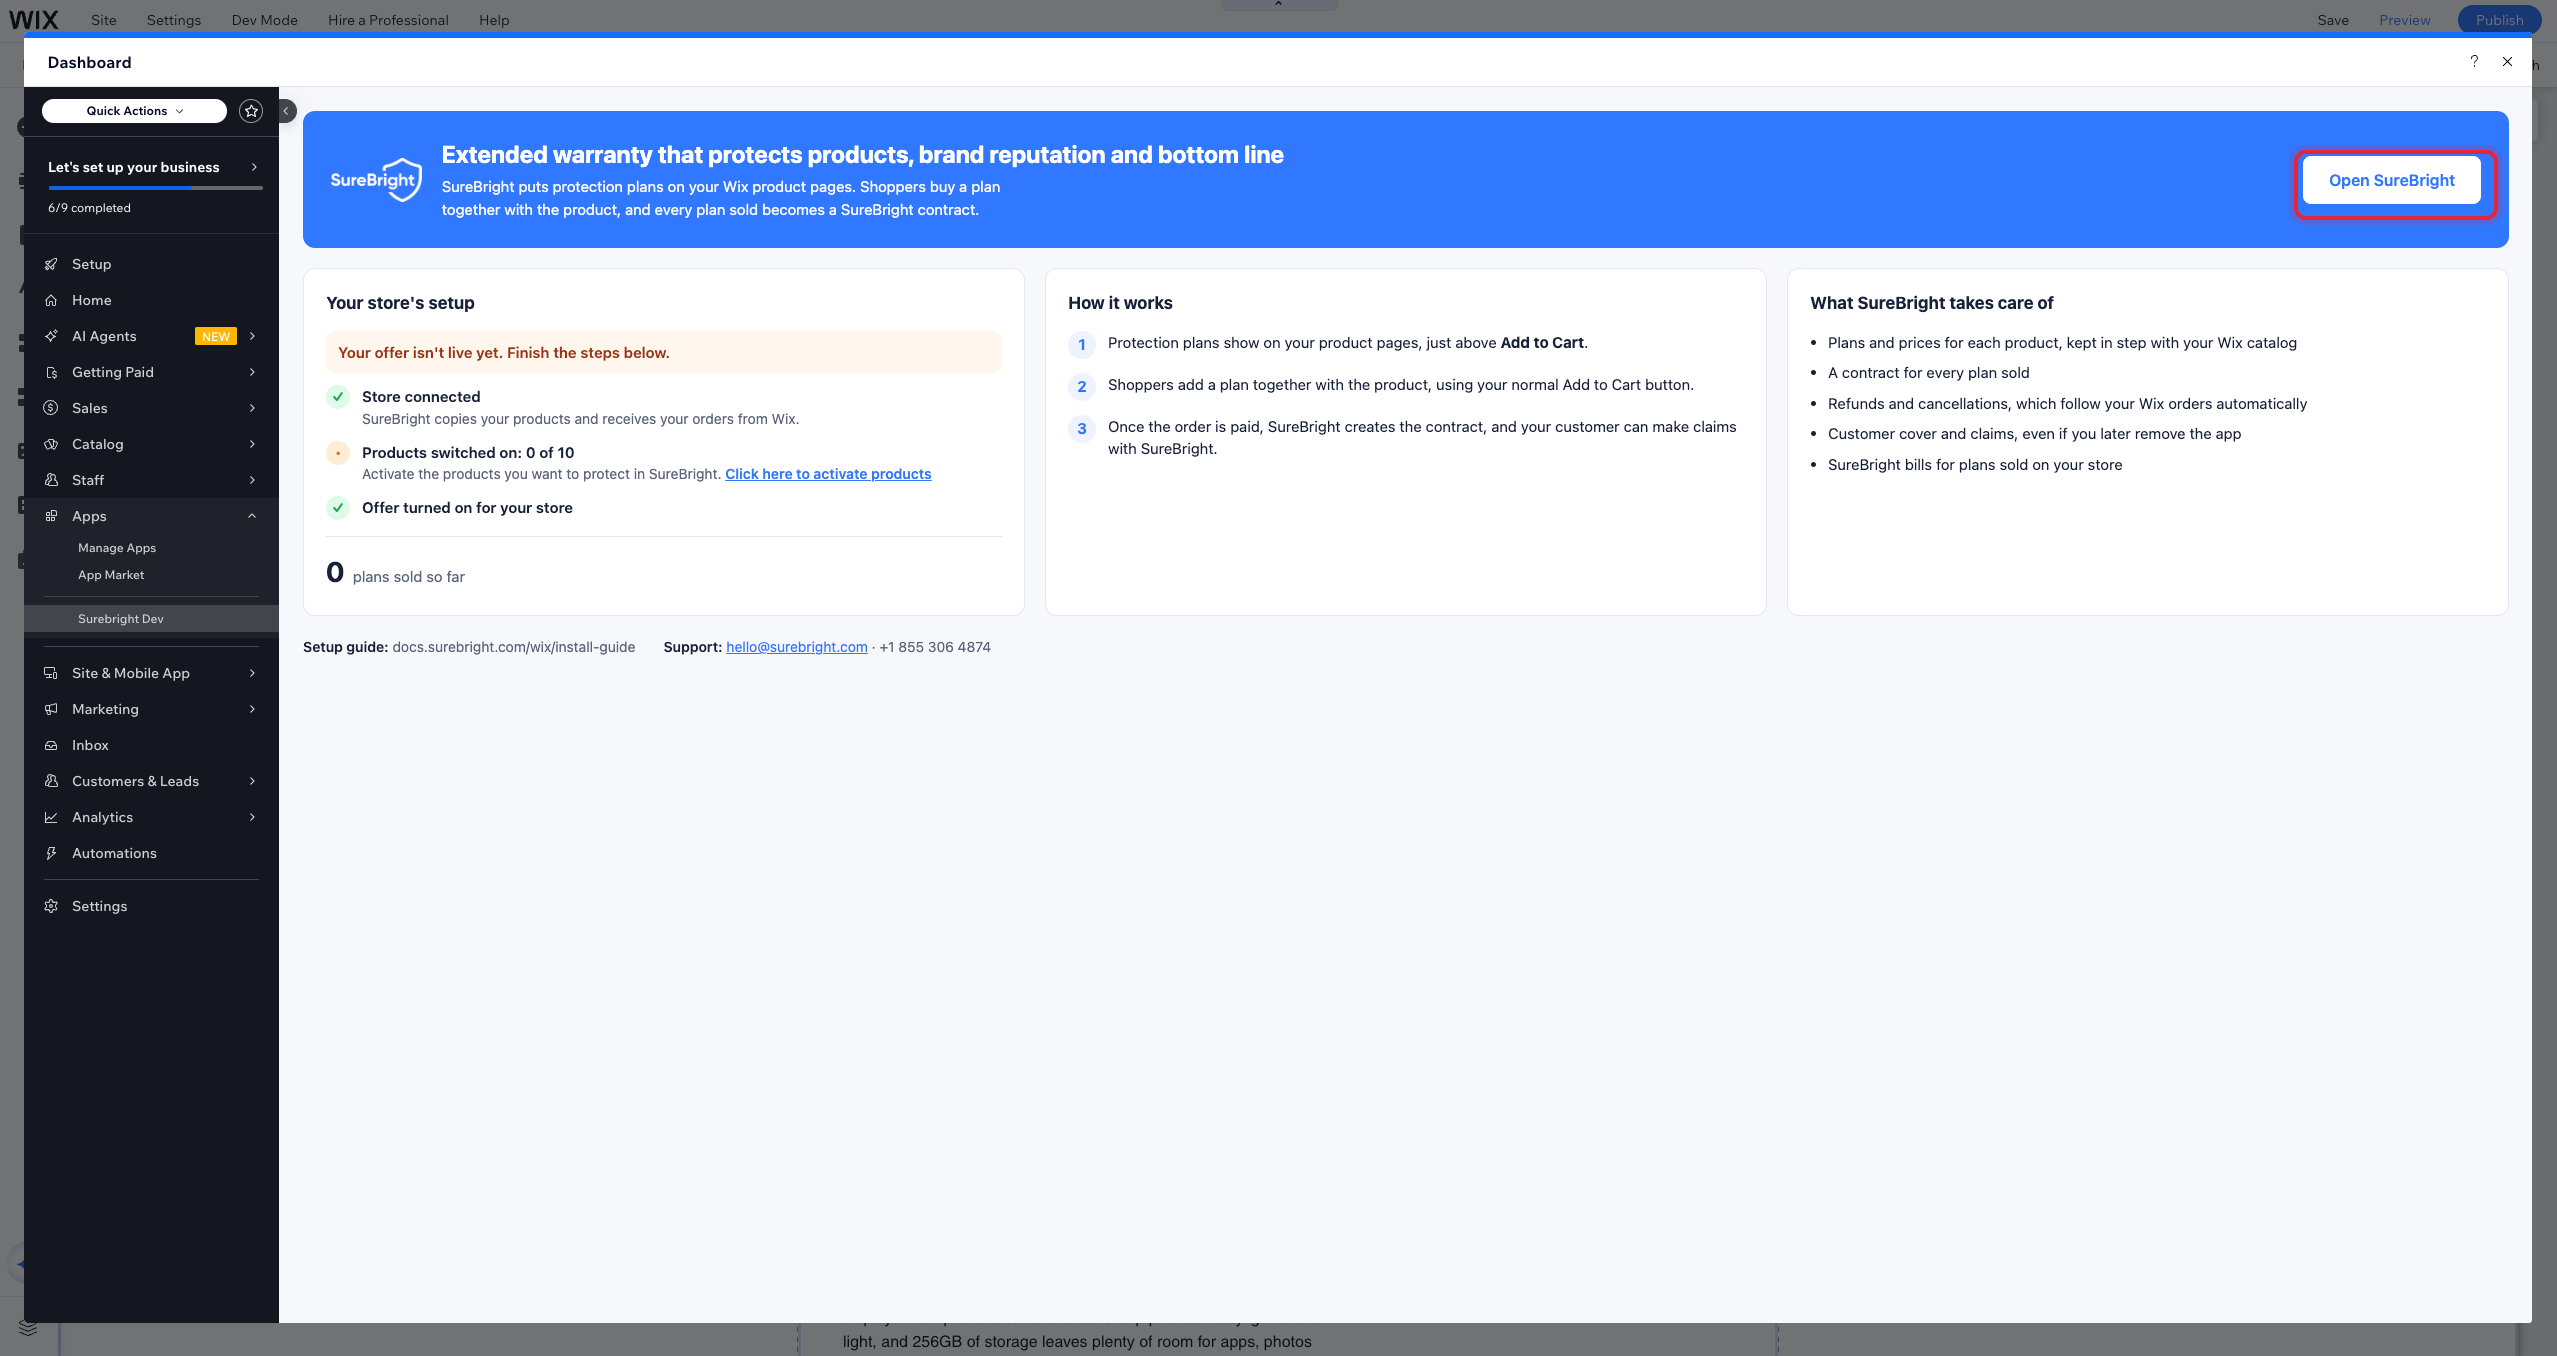
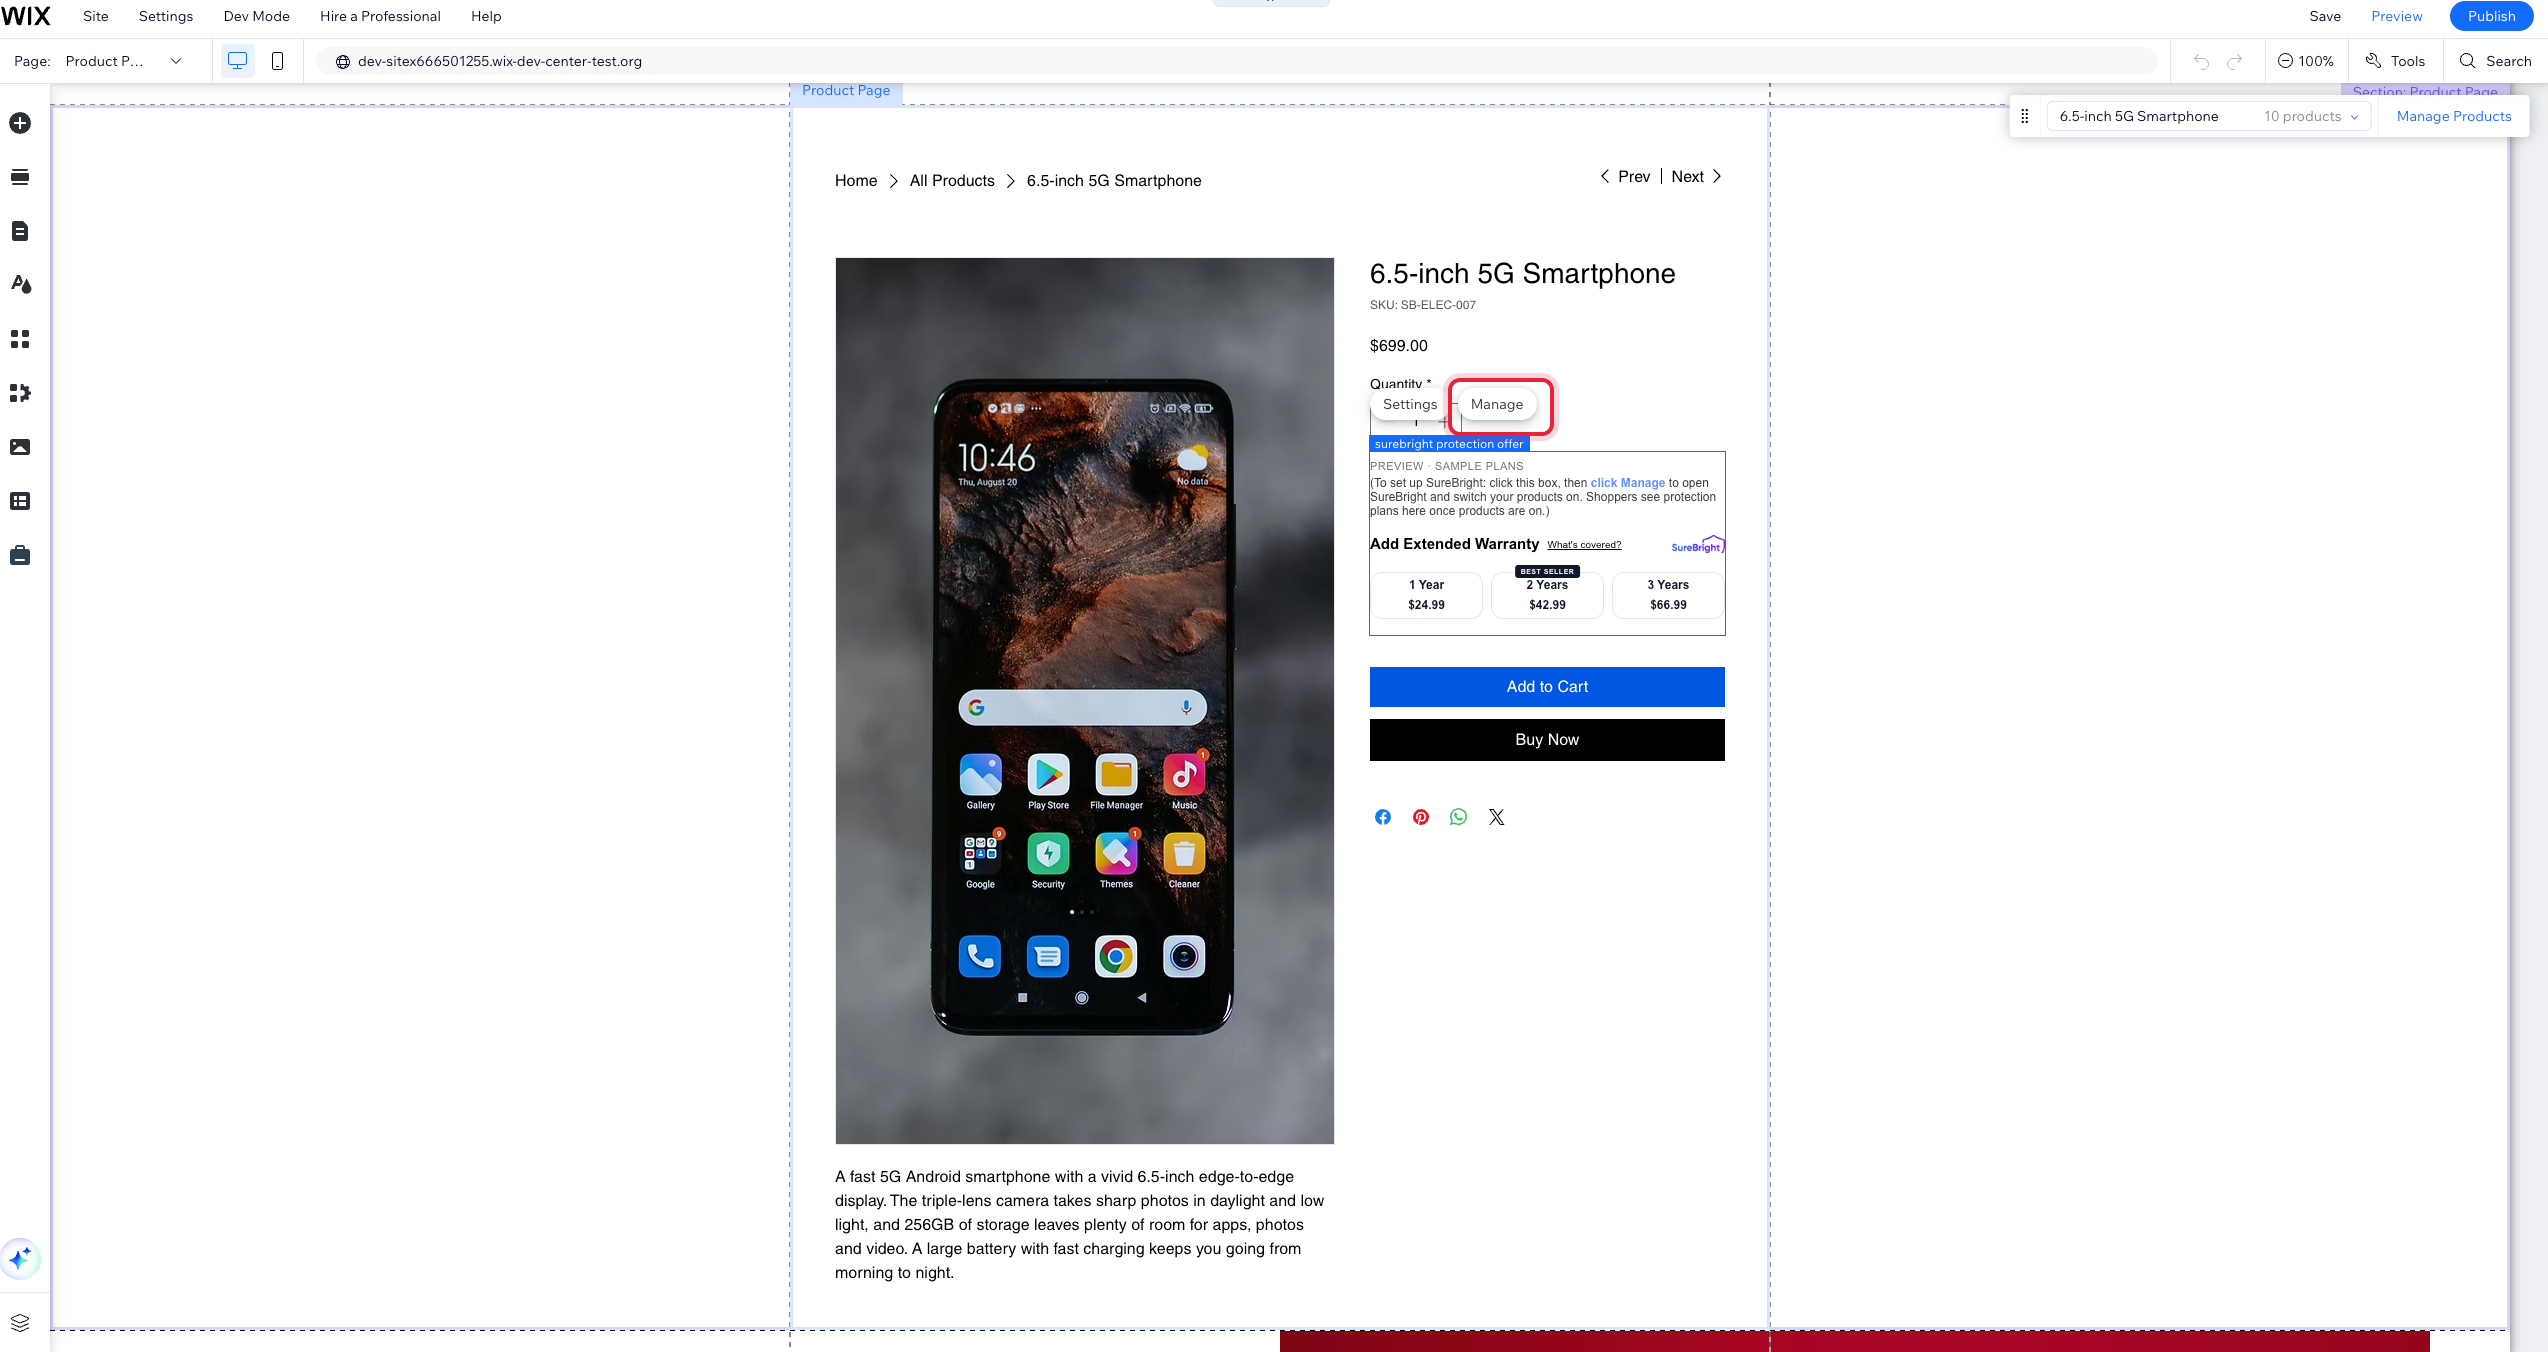 In the Editor, click the SureBright box, then **Manage**. The SureBright page opens in your Wix dashboard. Click **Open SureBright**: the SureBright merchant portal opens in a new tab, already signed in to your store. **Click here to activate products** on the same page opens the portal straight on Products.
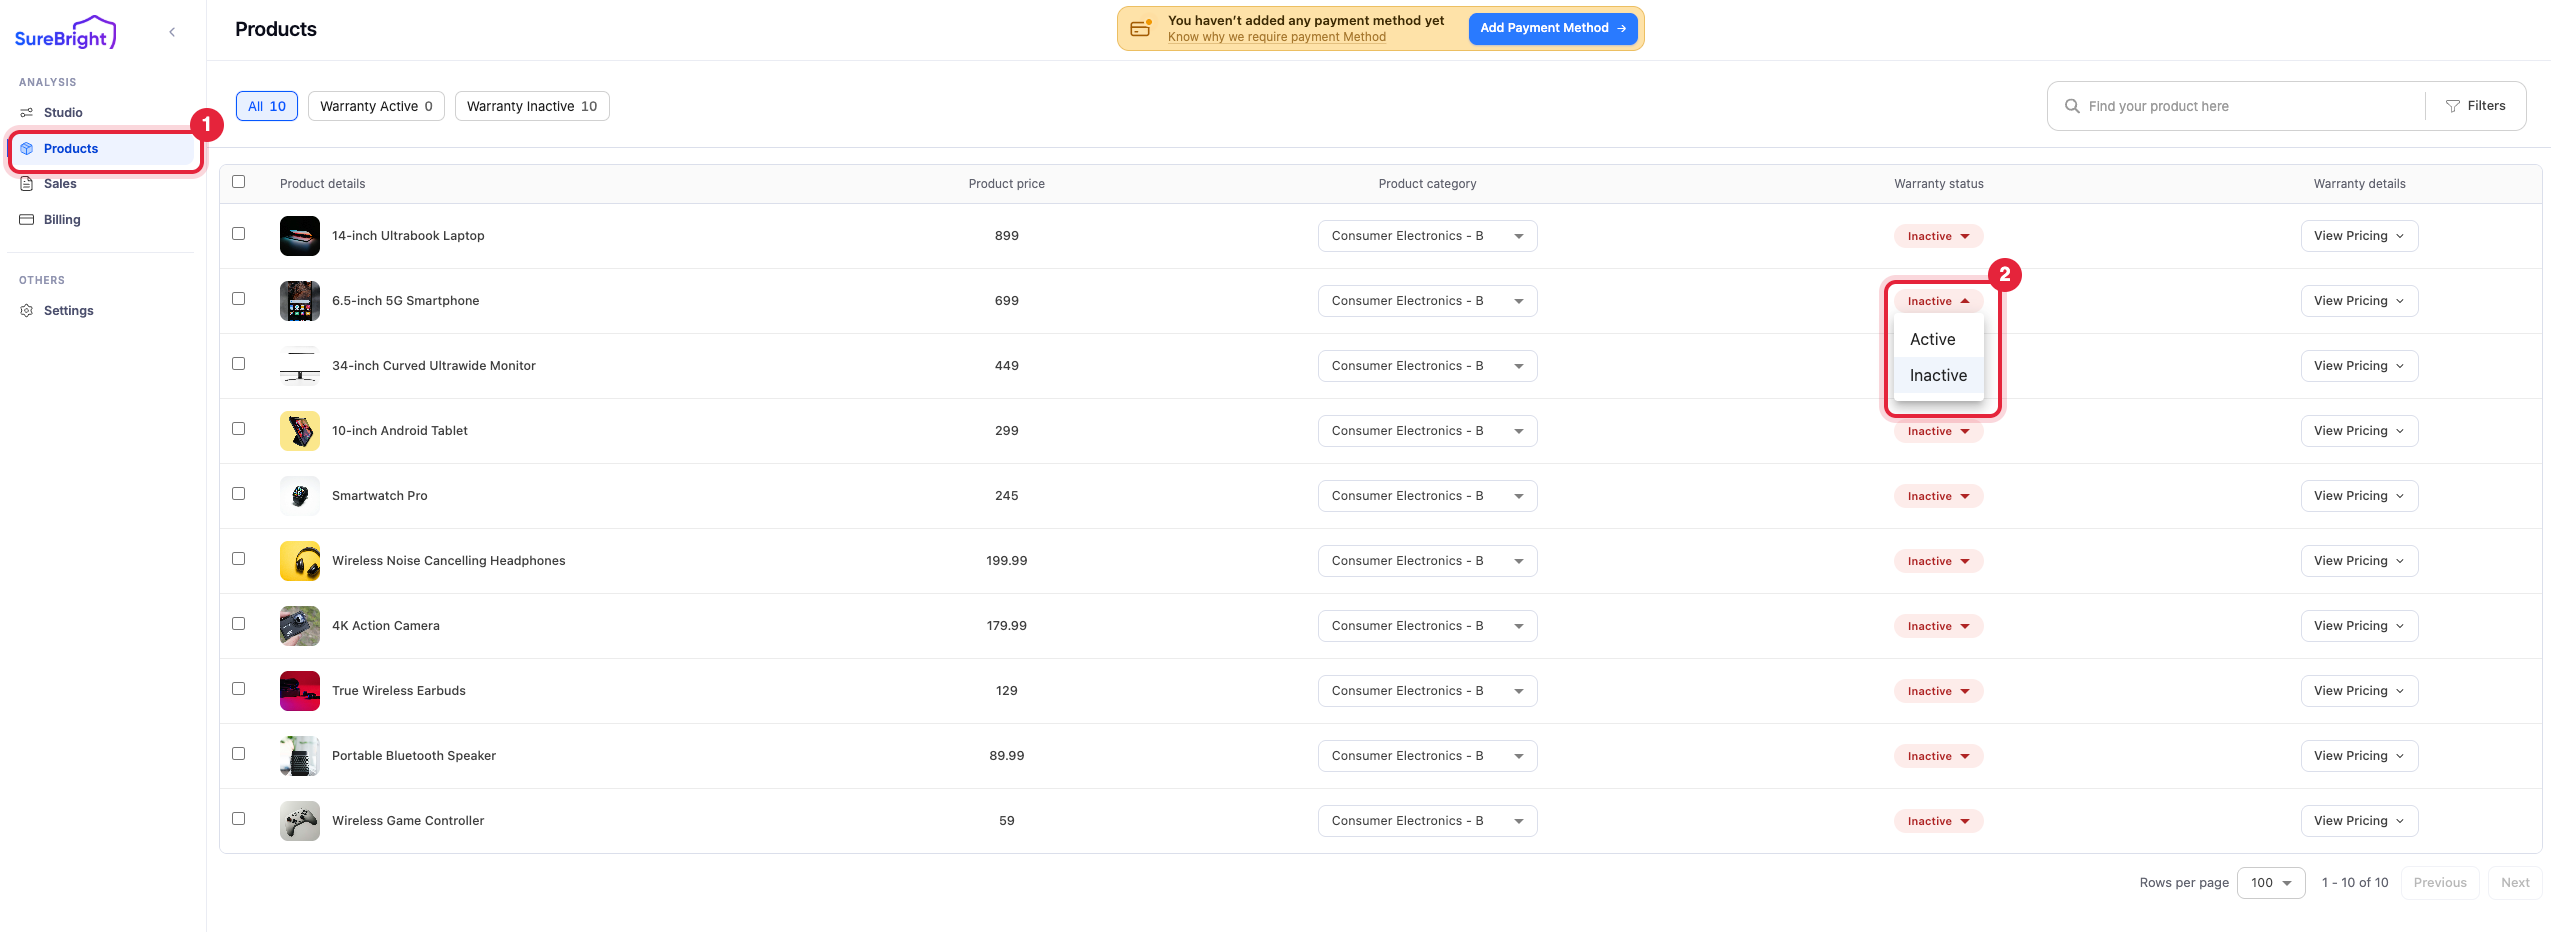
 In the portal, open **Products** (1) and set **Warranty status** to **Active** (2) for each product you want to protect. Every product starts as **Inactive**.
 You can reopen the SureBright page any time from **Apps** in your Wix dashboard, or with [this link](https://manage.wix.com/account/site-selector?actionUrl=https%3A%2F%2Fmanage.wix.com%2Fdashboard%2F%7BmetaSiteId%7D%2Fapp%2F34437ddf-6008-4e38-9988-395394e32b82). If it says **We're finishing setting up SureBright**, wait a moment. It refreshes on its own.
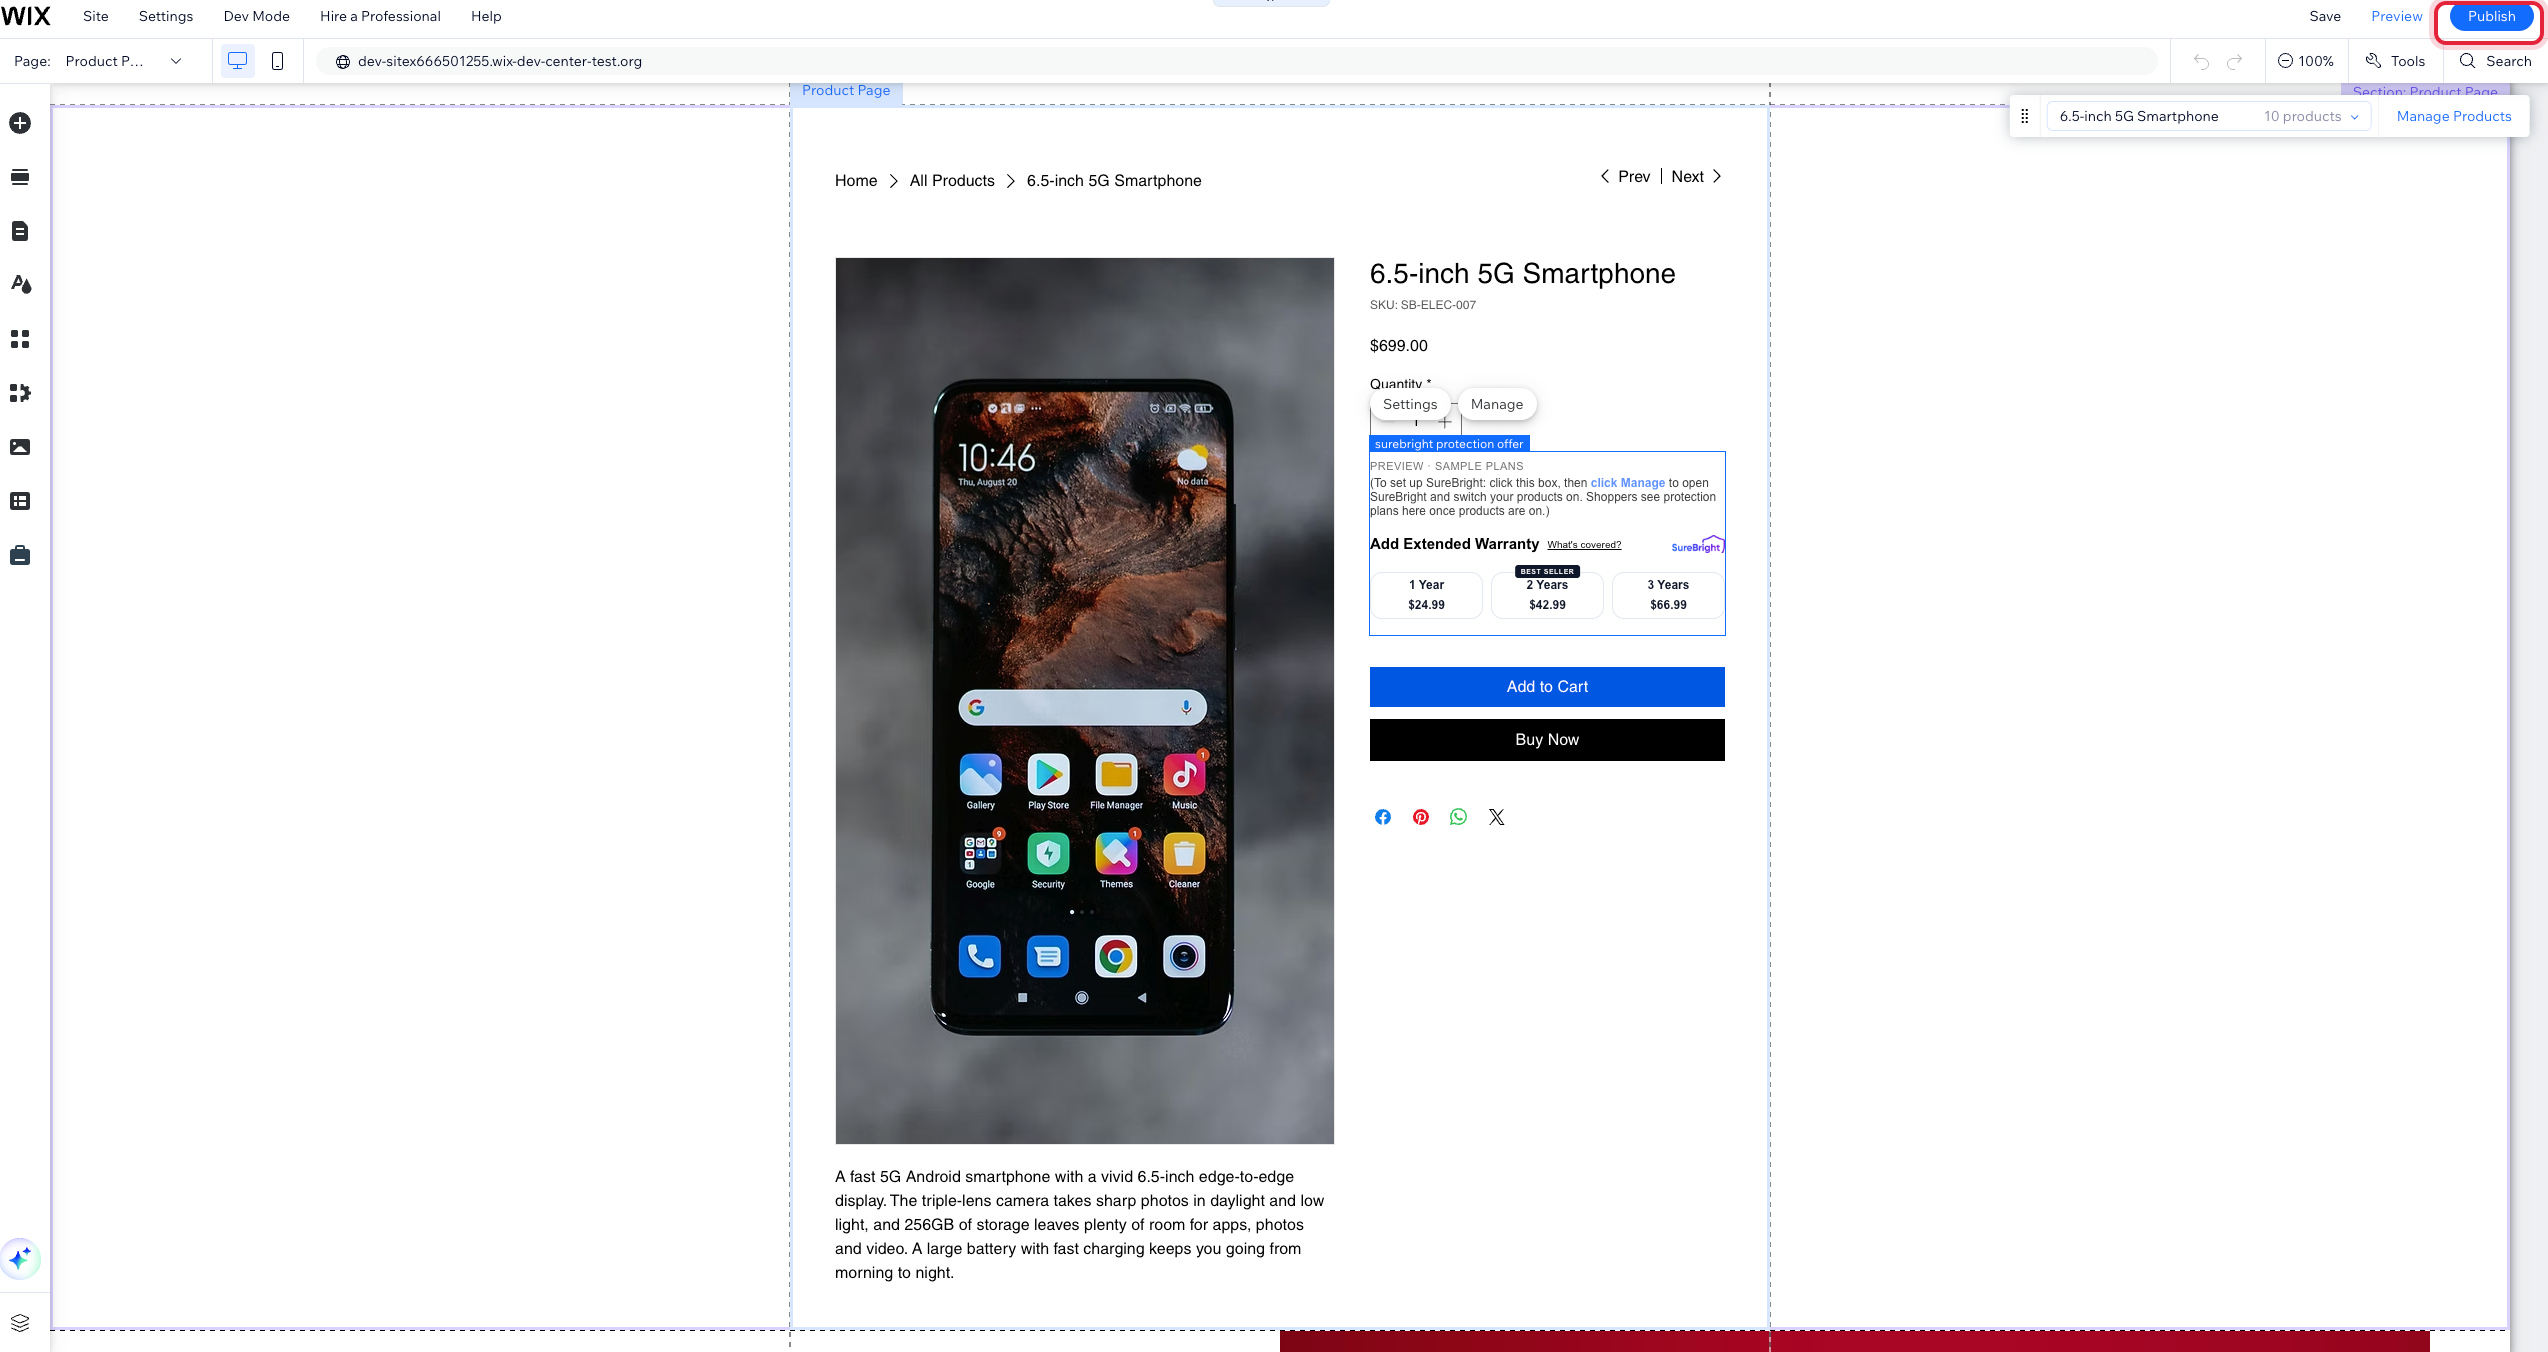
Once you have signed in to the merchant portal, go back to the Editor tab and click **Publish** at the top right. Wix adds the SureBright offer to your site's design, and the design only goes live when you publish. Until you do, the offer does not appear on your live site.
 The first person who opens SureBright from the Wix dashboard becomes the store's **Owner** in the merchant portal, so ask the site owner to open it first. Anyone else who opens it later gets their own access: **Admin** if they own the Wix site, otherwise a more limited role.
## Complete onboarding
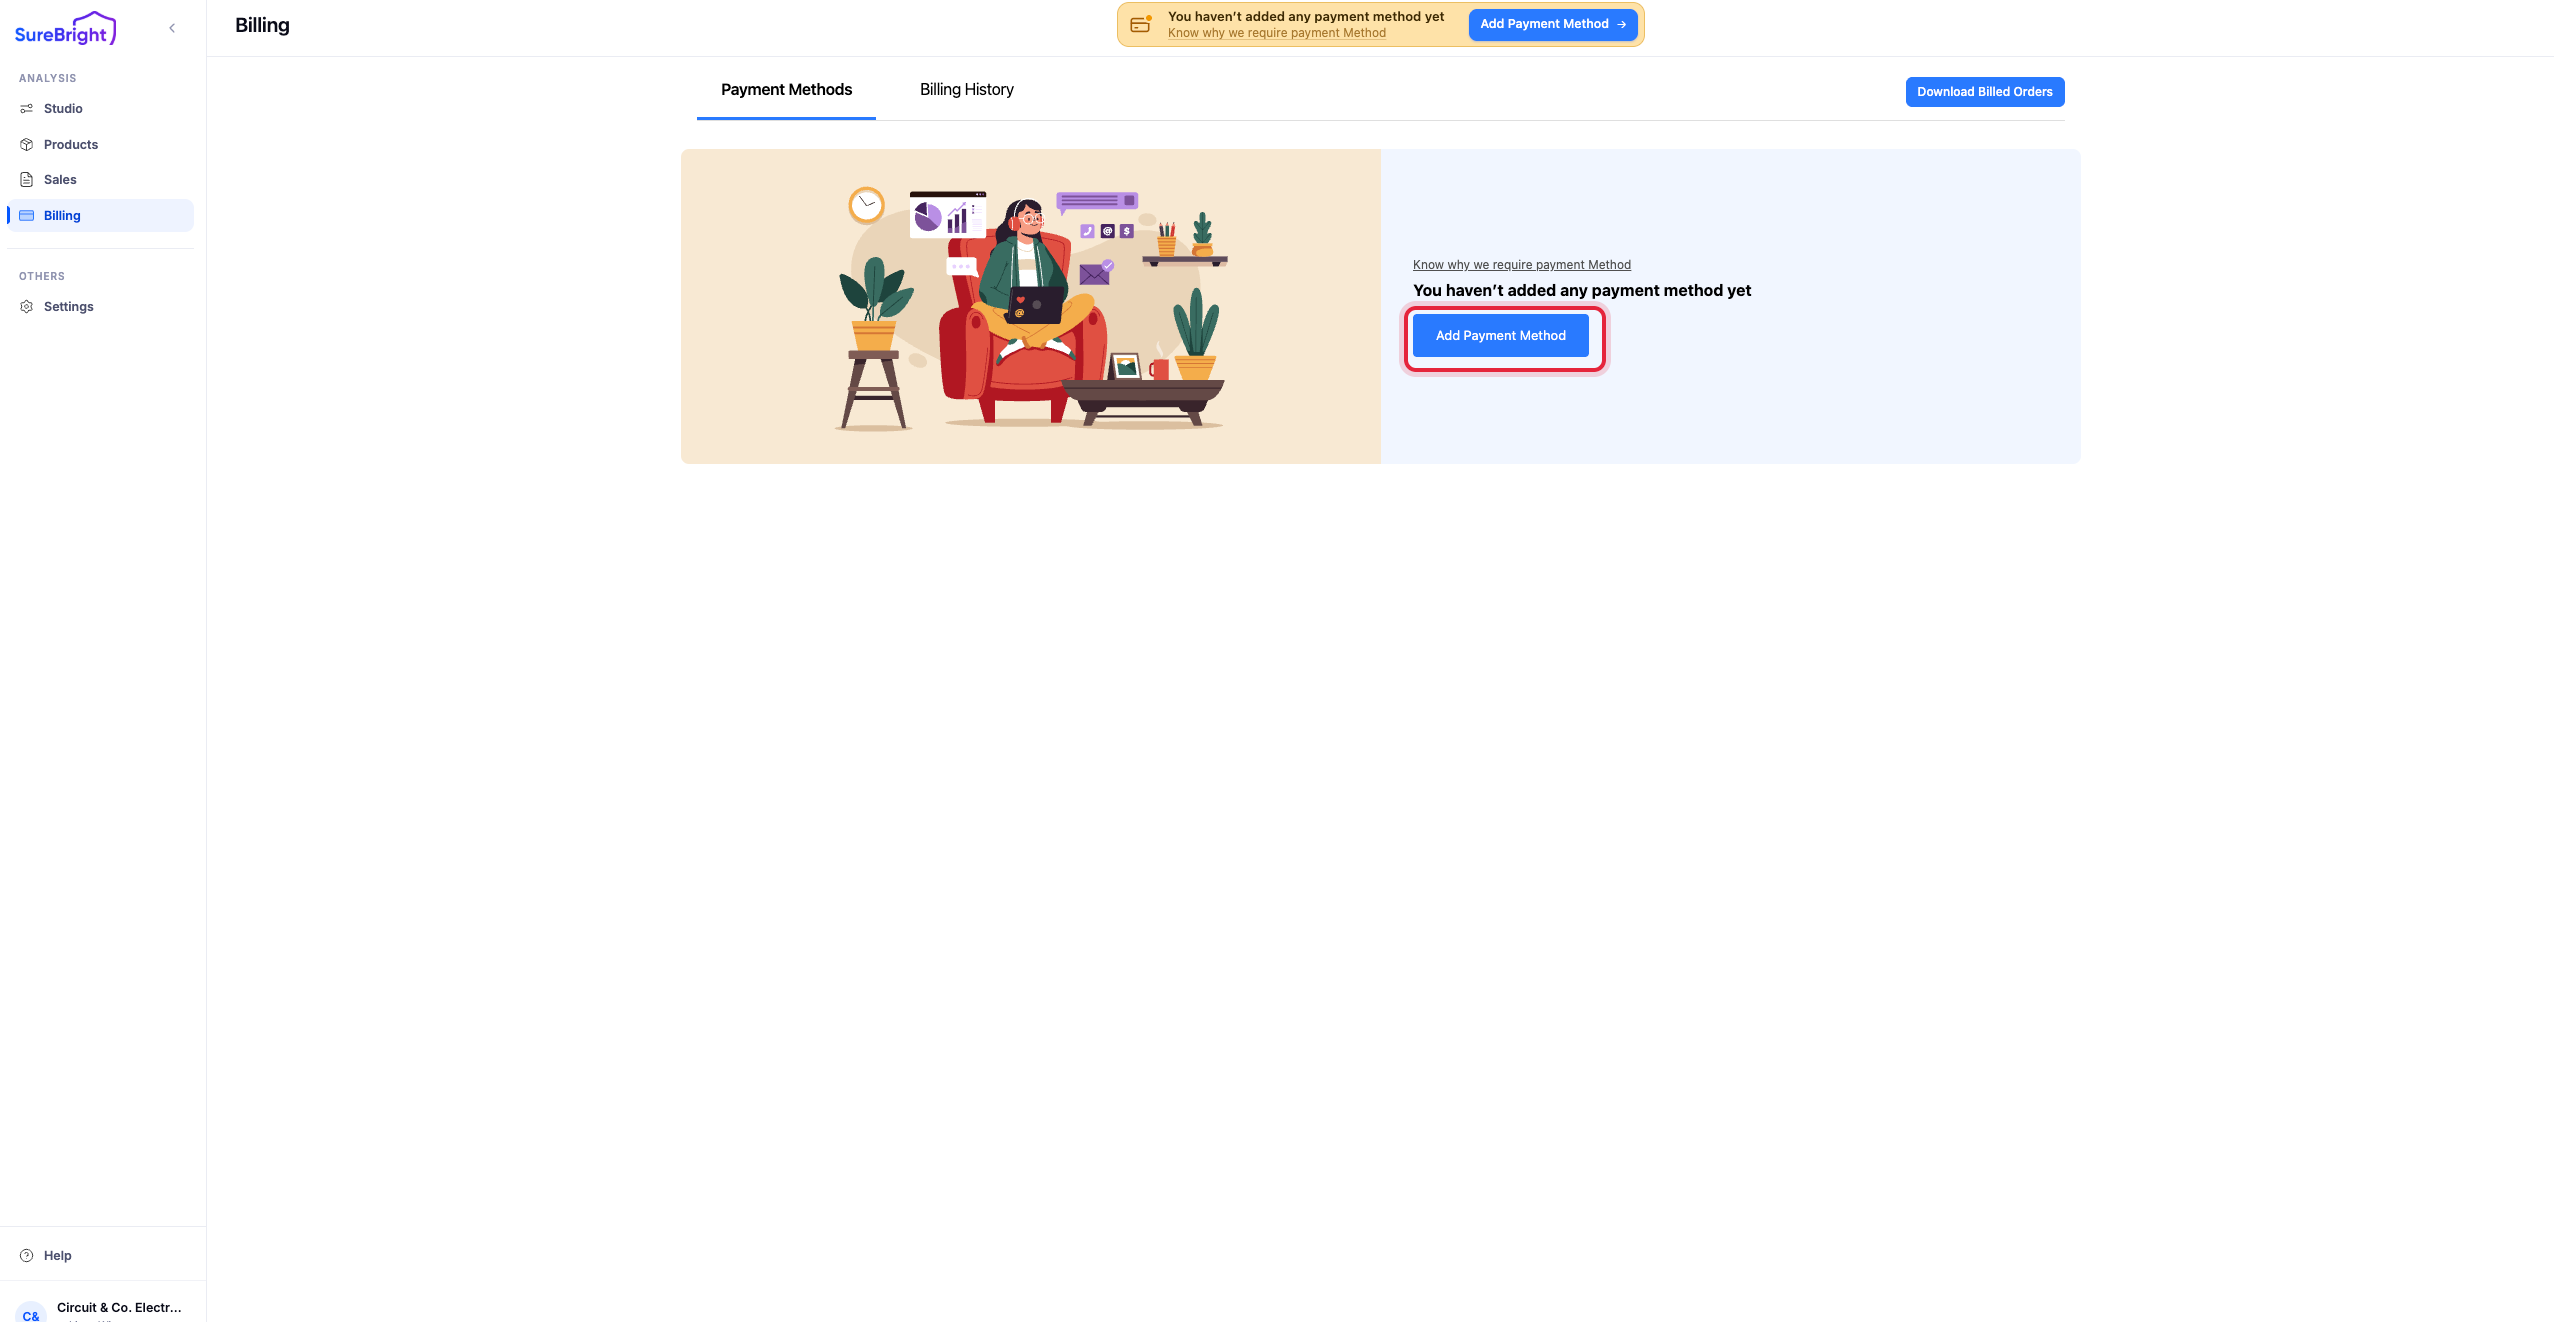
In the merchant portal, open **Billing** and click **Add Payment Method**. SureBright charges you for the protection plans sold on your store.
 Make sure each product you switched on has a SureBright category. A product needs one to be quoted. New products and changes you make in Wix reach SureBright on their own, so you never need to re-sync.
To change the offer's layout, colours or wording, open **Studio** in the portal and click **Open the studio**.
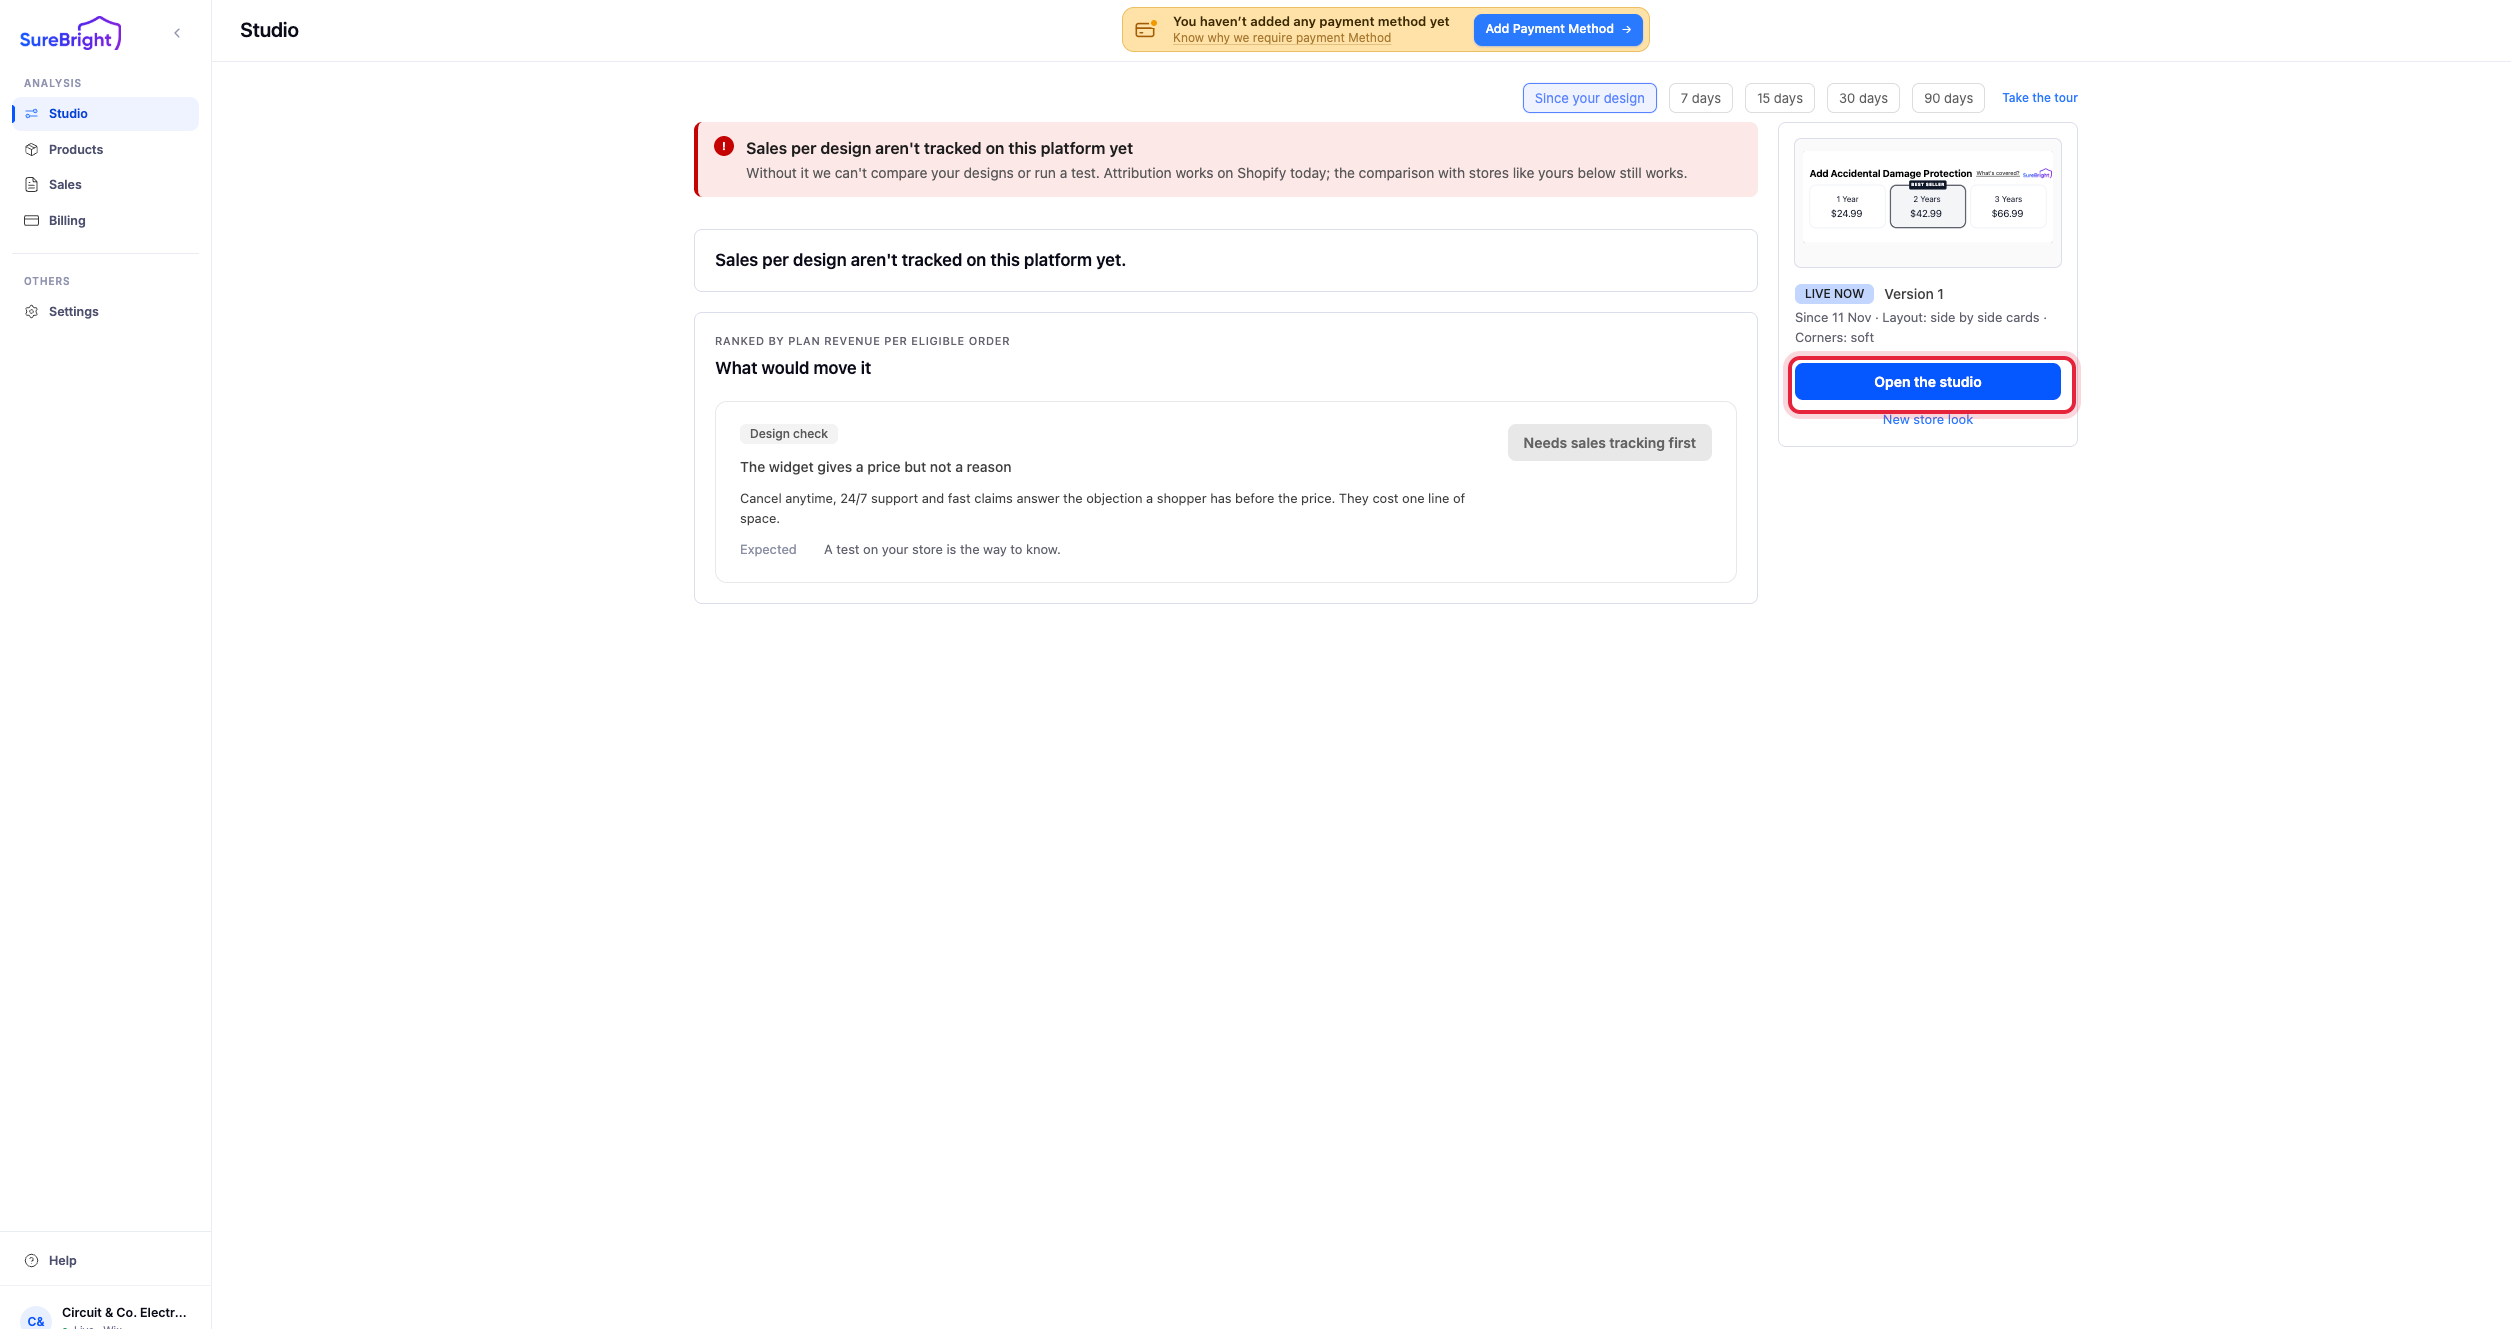 In SureBright, publish your design in **Studio** to turn the offer on (this is separate from publishing your site in the Wix Editor). If you can't open Studio yet, ask your SureBright account manager to turn it on.
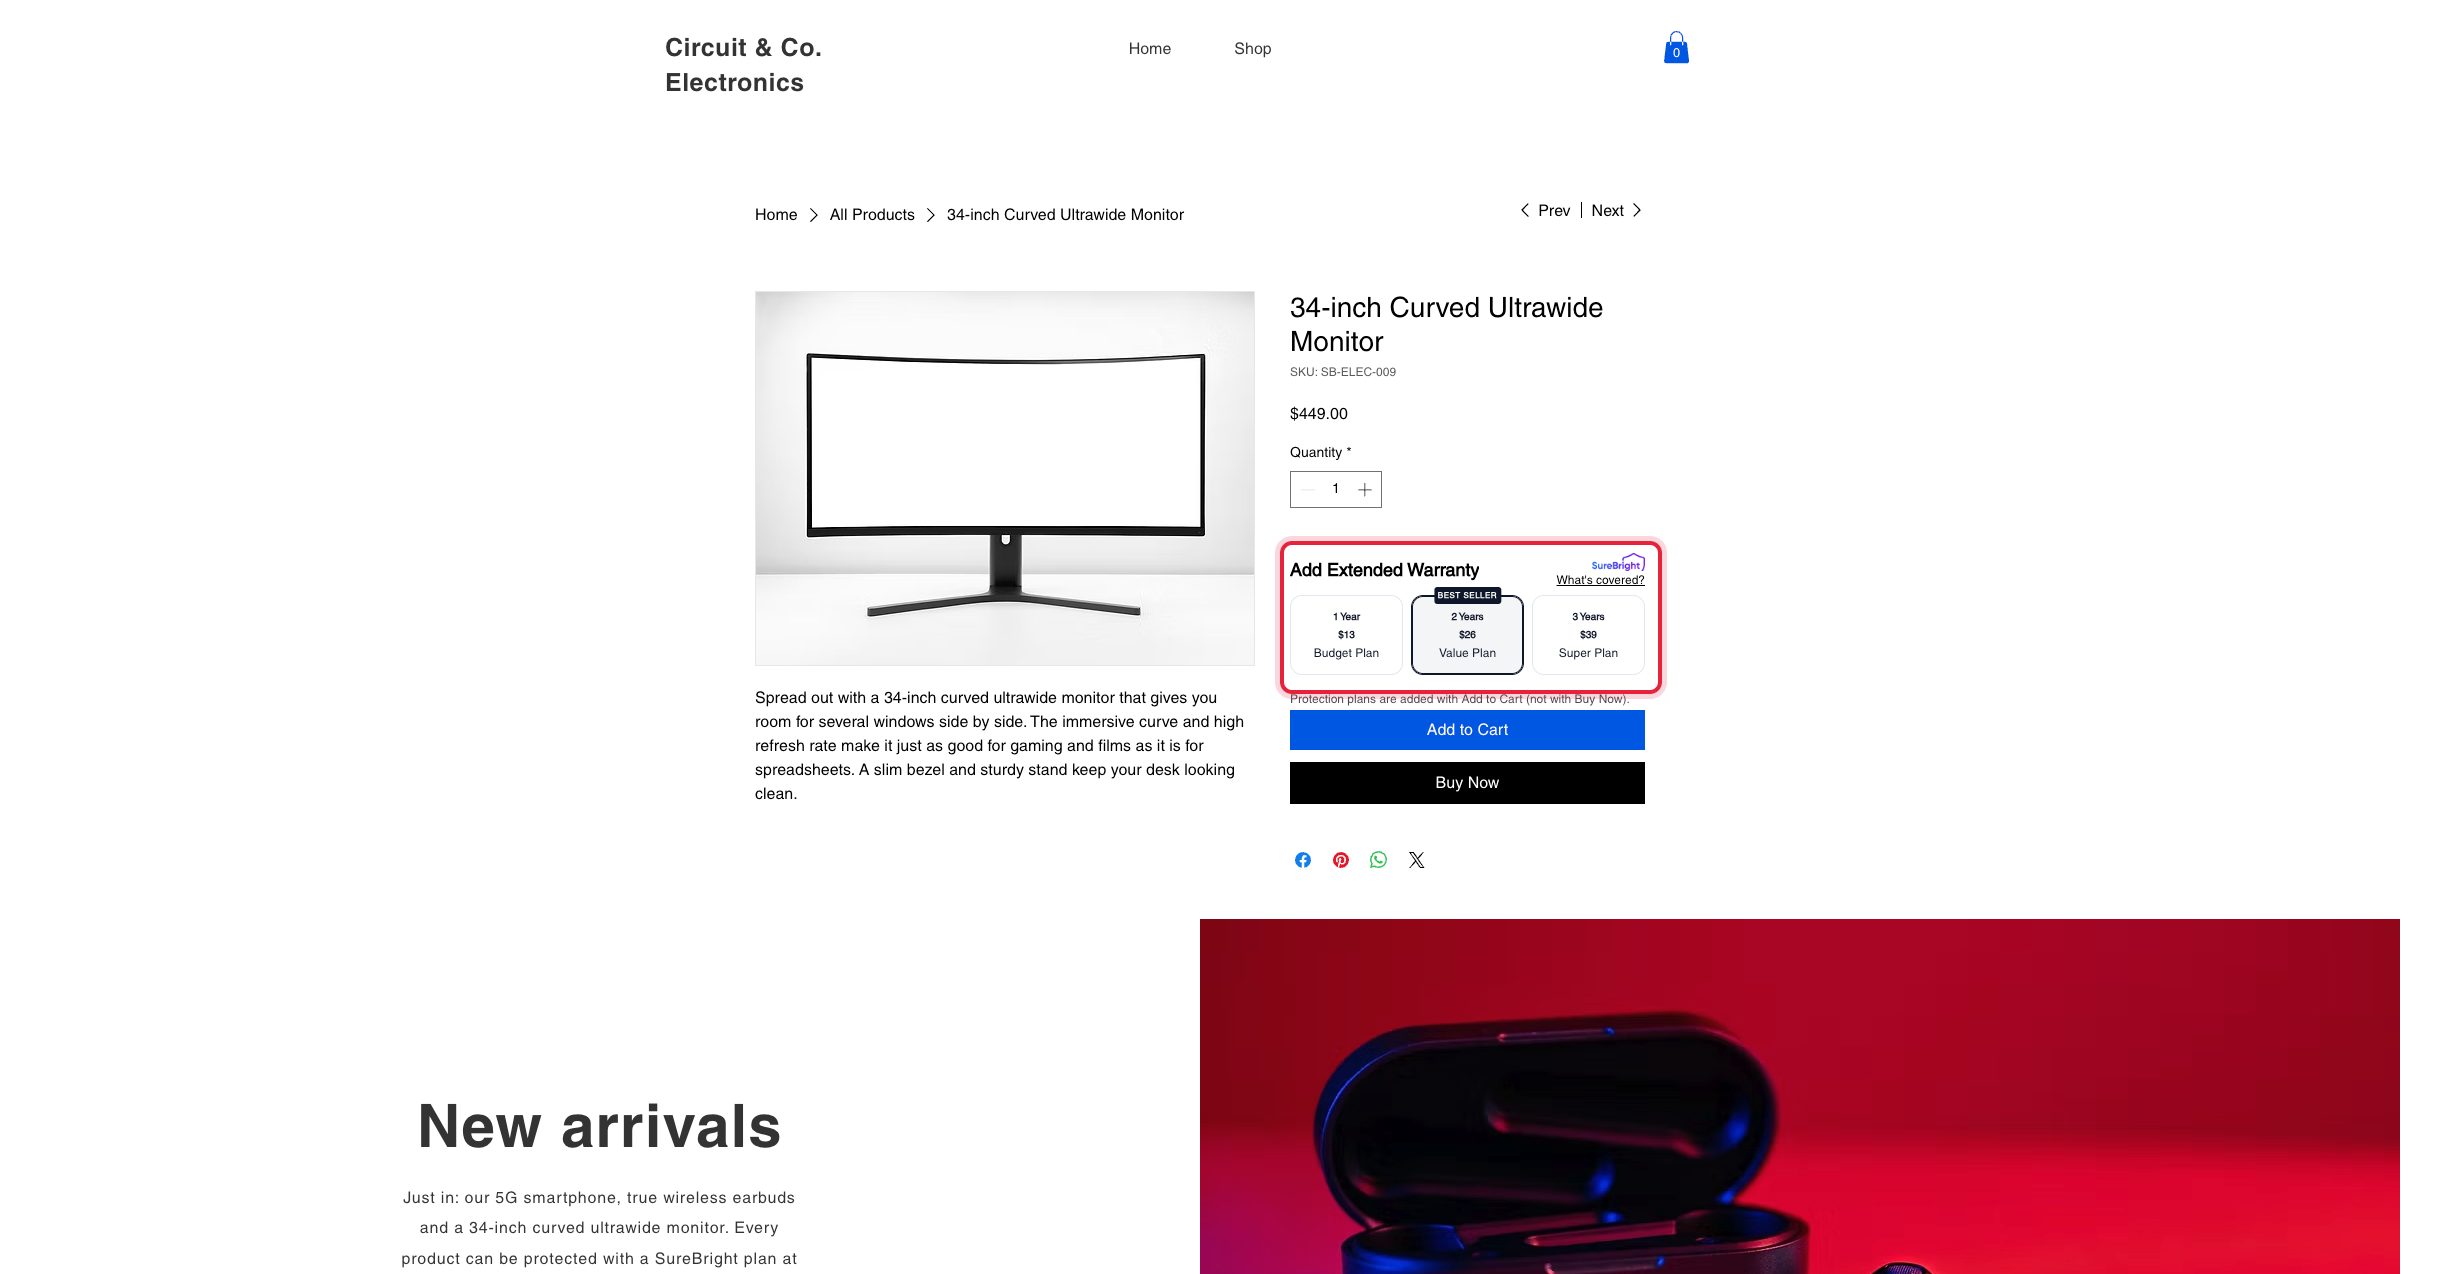
Then open an active product on your live site: the offer shows just above **Add to Cart**. If it does not, check that you published your site in the Wix Editor after installing SureBright.
 ## Next steps
Your Wix store is connected to SureBright. Then:
Where the offer shows, plans in the cart, contracts, refunds and cancellations.
How to remove SureBright from your site, and what is kept.