---
title: "Over the Phone Sales using Draft Order Extension"
description: "This document describes how to use Shopify’s Draft Orders to record over the phone sales"
---
A Draft Order in Shopify allows merchants to manually create orders for custom or over the phone sales outside the regular checkout process. It benefits merchants by providing personalized orders, flexible payment options, and the ability to review an invoice before payment. Draft orders reserve inventory, enabling quick adjustments like adding items or modifying quantities. They also allow for special discounts and act as quotations, offering transparency in pricing.
## Sales Use Cases/ Scenarios
We have listed the common scenarios/use cases below. Please feel free to directly jump to the scenario which is applicable to you.
1. Selling product and the warranty plan in one single order through Draft Orders
2. Selling a warranty plan for a customer who has already bought the product that he wants to cover using Shopify
3. Selling a warranty plan for the case when the customer had already bought the product but not on Shopify. Though the product is listed in your Shopify store.
4. Selling a warranty plan for the case when the customer had already bought the product but not on Shopify. Though the product is NOT listed on your Shopify store.
## Prerequisite
### Installing SureBright Extension for Draft Orders
**Note:** The SureBright Draft Order extension for Shopify requires permission to create draft orders.
Follow these steps to access the SureBright Draft Order extension:
1. Open any one of your existing draft orders or created orders.
2. If you don’t have an existing draft order, simply click on ‘Create order’ and add any product to it. Click ‘Save’ — only then will the next step become available.

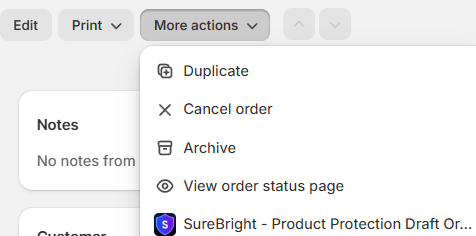
3. On the order page, click on the **More actions** dropdown (located at the top of the page).
4. From the dropdown, select **SureBright - Product Protection Draft Order**.
5. On first use, you will be redirected to a Shopify authentication screen for sharing necessary permissions. Please proceed with the same.
6. Once authenticated, the SureBright popup will open and you can begin adding warranty plans to your line items.
##
### Sales Use Case 1: Selling a Product and Warranty Plan in a Single Order through Draft Orders
You can create a draft order that sells both a product and its associated warranty plan in single transaction.
- In your Shopify admin, go to Orders \> Drafts \> Create Order.

- Search for the product by clicking “Browse” button and add it to the draft order.
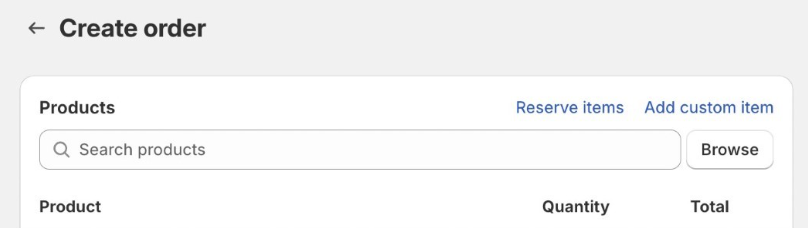
- Click Save on the top.

- In the draft order page, click on the **More actions** dropdown (located at the top of the order page).
- From the dropdown, select **SureBright - Product Protection Draft Order**.

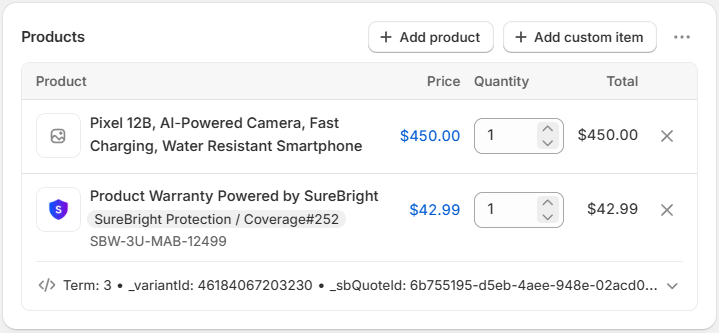
- A popup will open. For the respective line items, select the appropriate warranty plan from the drop-down menu and click **Save**.
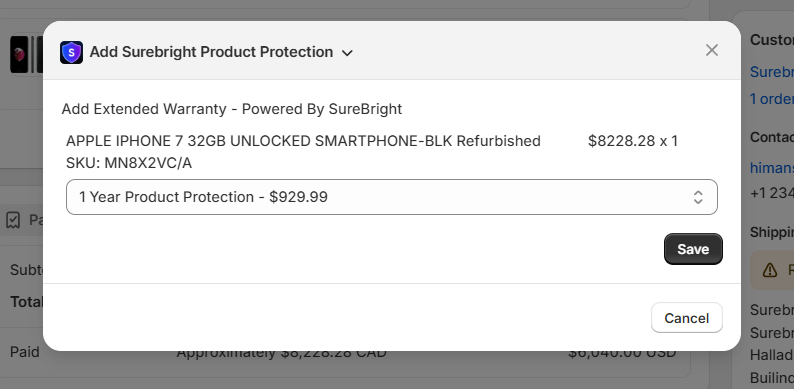
- Confirm the product and warranty are added.
- Choose the payment method or send an invoice to the customer.
- Fulfill the order once payment is completed.
### Sales Use Case 2: Selling a Warranty Plan for a Customer Who Already Bought the Product via Shopify
If a customer previously purchased a product from your Shopify store and now wants to buy a warranty:
- Open Order page with the product sale for which policy is to be purchased.
- Click on the **More actions** dropdown and select **SureBright - Product Protection Draft Order**.

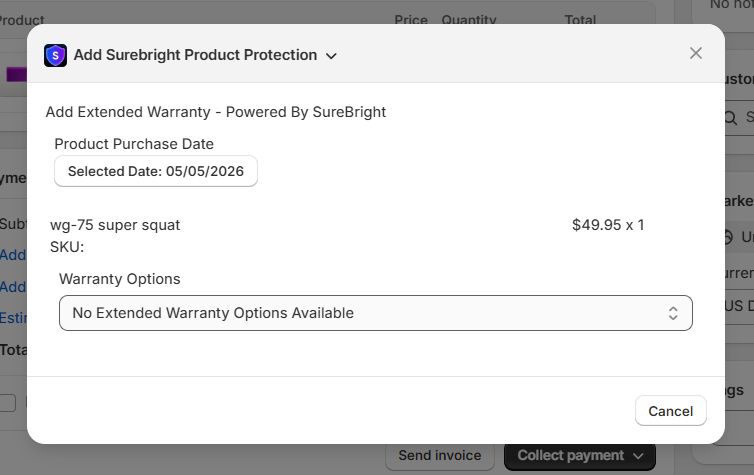
- A popup will open. For the respective line items, select the appropriate warranty plan from the drop-down menu and click **Save**.

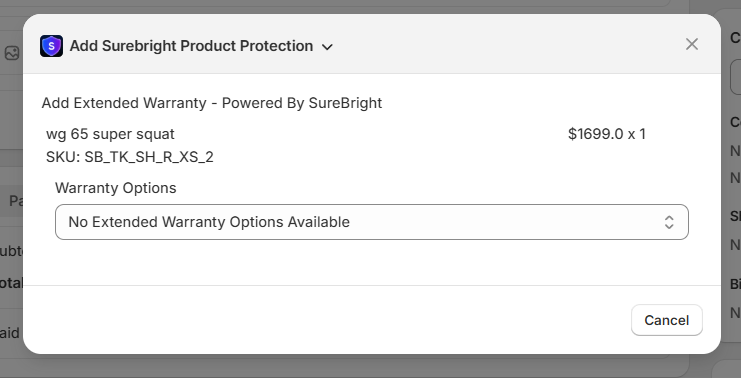
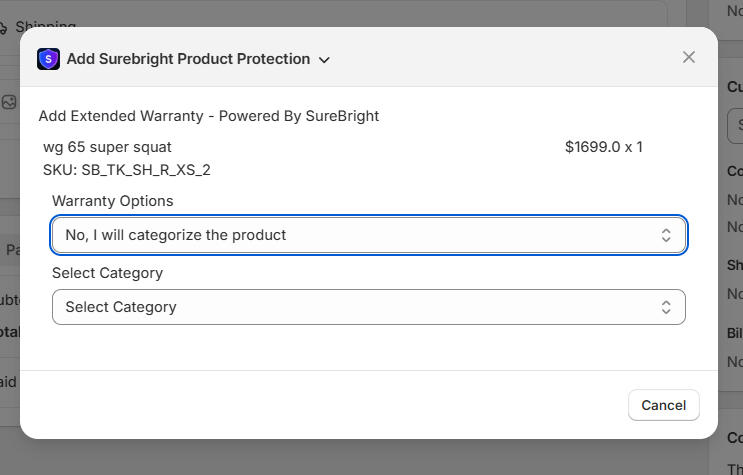
- If the product has not been auto-categorized yet, the warranty options dropdown will display **"No Extended Warranty Options Available"**.
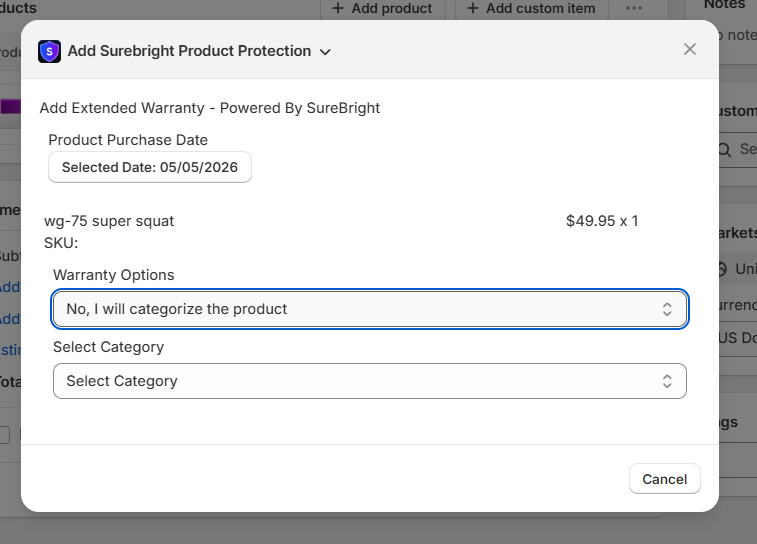
- Click on the dropdown and select **"No, I will categorize the product"**. A **Select Category** dropdown will appear below.
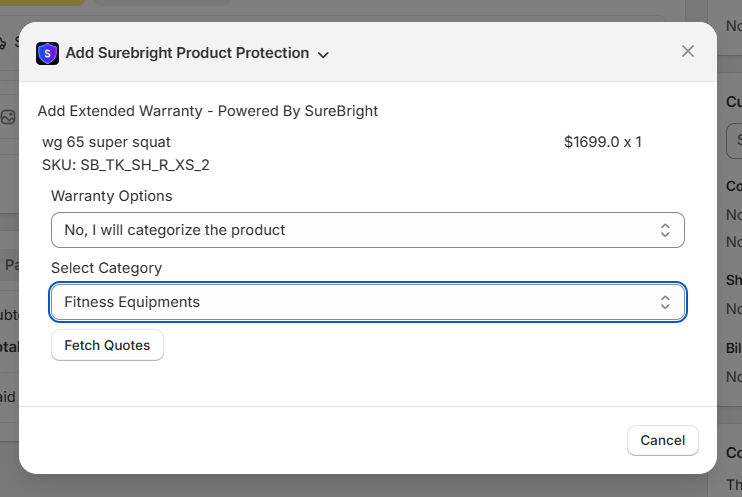
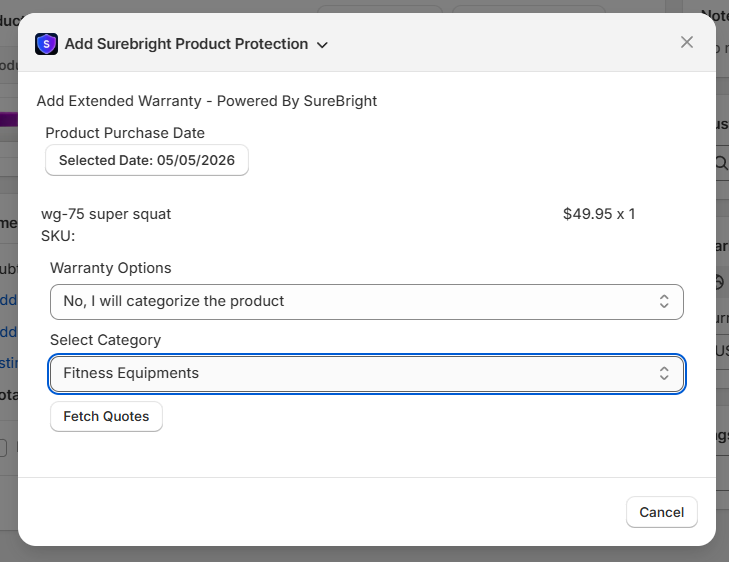
- Choose the appropriate category for the product. A **Fetch Quotes** button will appear — click it to retrieve available warranty policies.
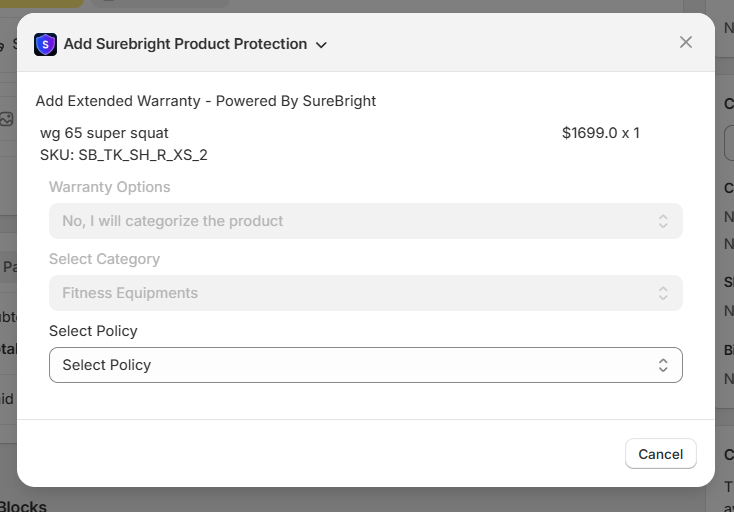
- Once quotes are fetched, a **Select Policy** dropdown will appear.
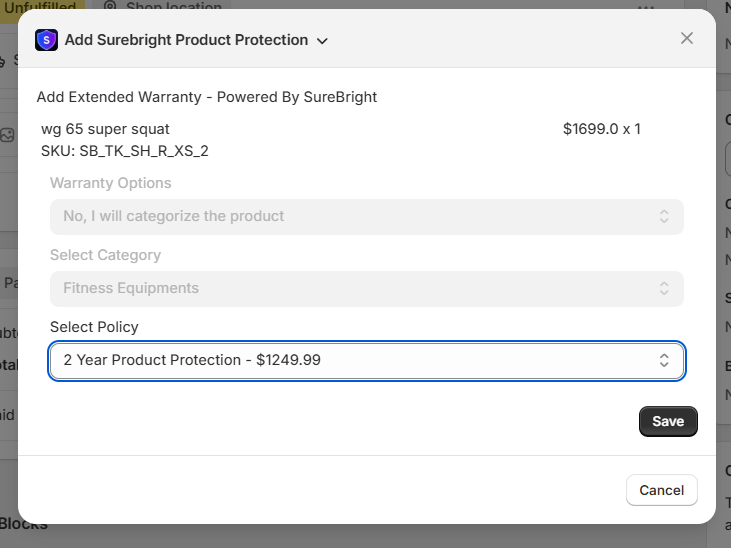
- Choose your preferred warranty policy from the list and click **Save** to complete the process.
- Set the payment terms or send an invoice.
### Sales Use Case 3: Selling a Warranty Plan for a Customer Who Bought the Product Elsewhere, But It’s Listed in Your Shopify Store
If a customer bought a product from another platform but the product is present in your Shopify store, you can still sell them a warranty plan.
- In your Shopify admin, go to Orders \> Drafts \> Create Order.

- Search for the product by clicking “Browse” button and add it to the draft order. You can add it for record-keeping purposes, even if they already own the product.

- Click Save on the top.

- Click on the **More actions** dropdown and select **SureBright - Product Protection Draft Order**.

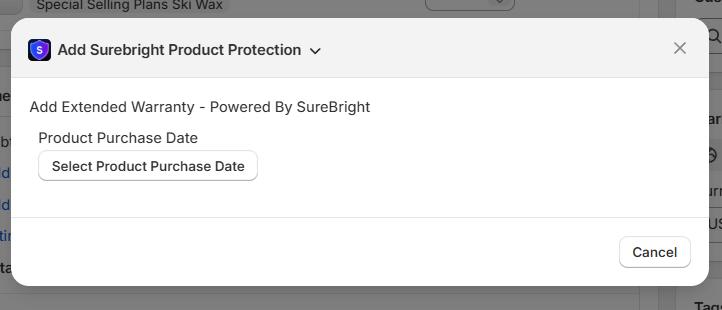
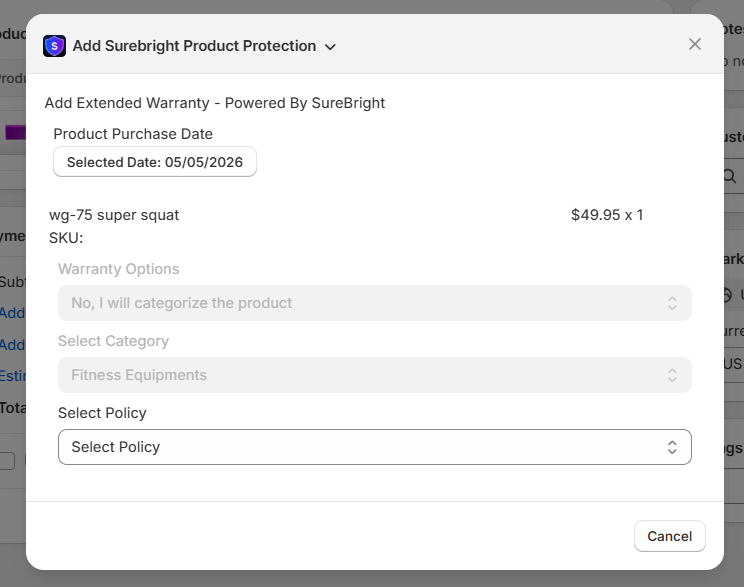
- A popup will open prompting you to select the product purchase date. Click on **Select Product Purchase Date** to open the date picker.
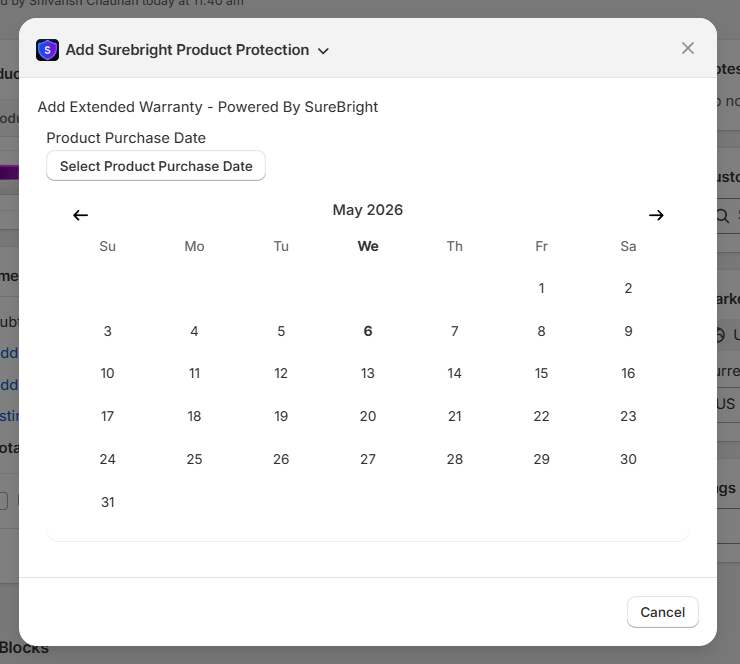
- The date picker calendar will appear. Select the product purchase date.
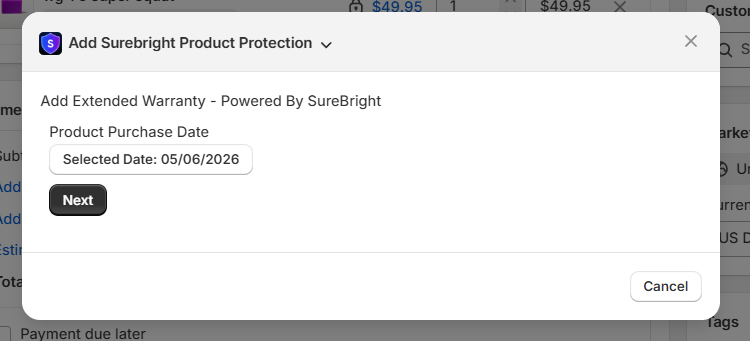
- Once selected, the chosen date will be displayed. Click **Next** to proceed.
- For the respective line items, select the appropriate warranty plan from the drop-down menu and click **Save**.
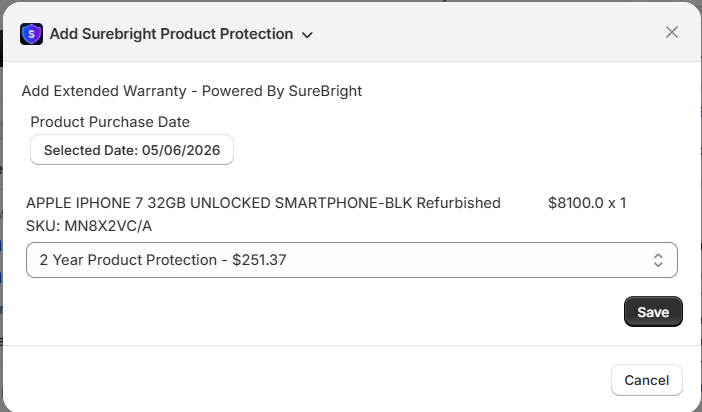
- The warranty will be added to the draft order alongside the product.
- To remove the line item associated with the selected warranty, click on the ‘Delete’ icon next to the original product. (This step ensures the product is not purchased twice.)
- The bill will only contain the warranty for the associated product. Set the payment terms. Finalize and fulfill the order once the warranty payment is processed
### Sales Use Case 4: Selling a warranty plan for the customer who bought the product outside Shopify, and the product SKU is not listed in your Shopify Store
In cases where the product is not listed on your Shopify store, but a customer wants to buy a warranty for it:
- If the product SKU selected is not present in your Shopify store, then add it in your Shopify store.
After adding SKU, please wait a few hours for auto-categorization to work. Only then will the policy options become visible. For immediate assistance, feel free to contact us at [support@surebright.com](mailto:support@surebright.com).
- Navigate to Orders \> Drafts \> Create Order

- Search for the product for which the warranty is to be selected by clicking Browse (which is listed on your Shopify store) and add it to the draft order.

- You can add it for record-keeping purposes, even if they already own the product.
- Click Save on the top.

- Click on the **More actions** dropdown and select **SureBright - Product Protection Draft Order**.

- A popup will open prompting you to select the product purchase date. Click on **Select Product Purchase Date** to open the date picker.

- The date picker calendar will appear. Select the product purchase date.

- Once selected, the chosen date will be displayed. Click **Next** to proceed.

- The system will show "No Extended Warranty Options Available" in the warranty options dropdown.
- Click on the dropdown and select **"No, I will categorize the product"** to enable manual categorization.
- A **Select Category** dropdown will appear below.
- Choose the appropriate category for your product from the available options.
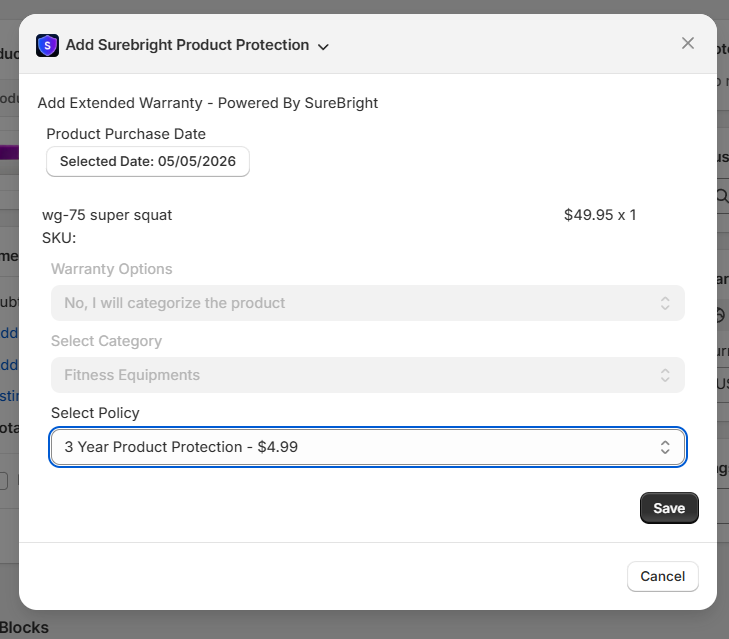
- After selecting the category, a **Fetch Quotes** button will appear. Click **Fetch Quotes** to retrieve available warranty policies for the selected category.
- Once quotes are fetched, a **Select Policy** dropdown will appear.
- Choose your preferred warranty policy from the list and click **Save** to complete the process.
- The warranty will be added to the draft order alongside the product.

- To remove the line item associated with the selected warranty, click on the ‘Delete’ icon next to the original product. (This step ensures the product is not purchased twice.)
- Set the payment terms or send an invoice. Finalize and fulfill the order once the warranty payment is processed.
1. **E-Commerce Platform Apps**
- Shopify
- WooCommerce
- BigCommerce
- Shift4Shop
2. **Brick and Mortar Store and Over the Phone Sales**
- Shopify POS
- Lightspeed POS
- Dedicated POS portal
3. **Missed Point of Sales and Marketplace (e.g., Amazon) Sales**
- Dedicated Online Portal
- QR Code-based warranty cross-selling
- 1-click checkout dynamic web links for retailer's post-purchase campaigns
- Follow up email campaigns
4. **Independent Websites**
- Integration via two simple APIs
- Website widget